Getting Started
TechScore's AI engine makes assessing a candidate for a job role effortless by handling all the complexity behind the scenes. Get started with TechScore in 5 easy steps:
- Create a job role.
- Add a Candidate.
- Send an assessment invite to the candidate for the job role.
- The candidate completes the comprehensive assessment invite.
- Download the candidate evaluation report and share it with your recruitment team.
Repeat these steps, and let the magic happen.
1. Create a Role
- Navigate to the Roles page.
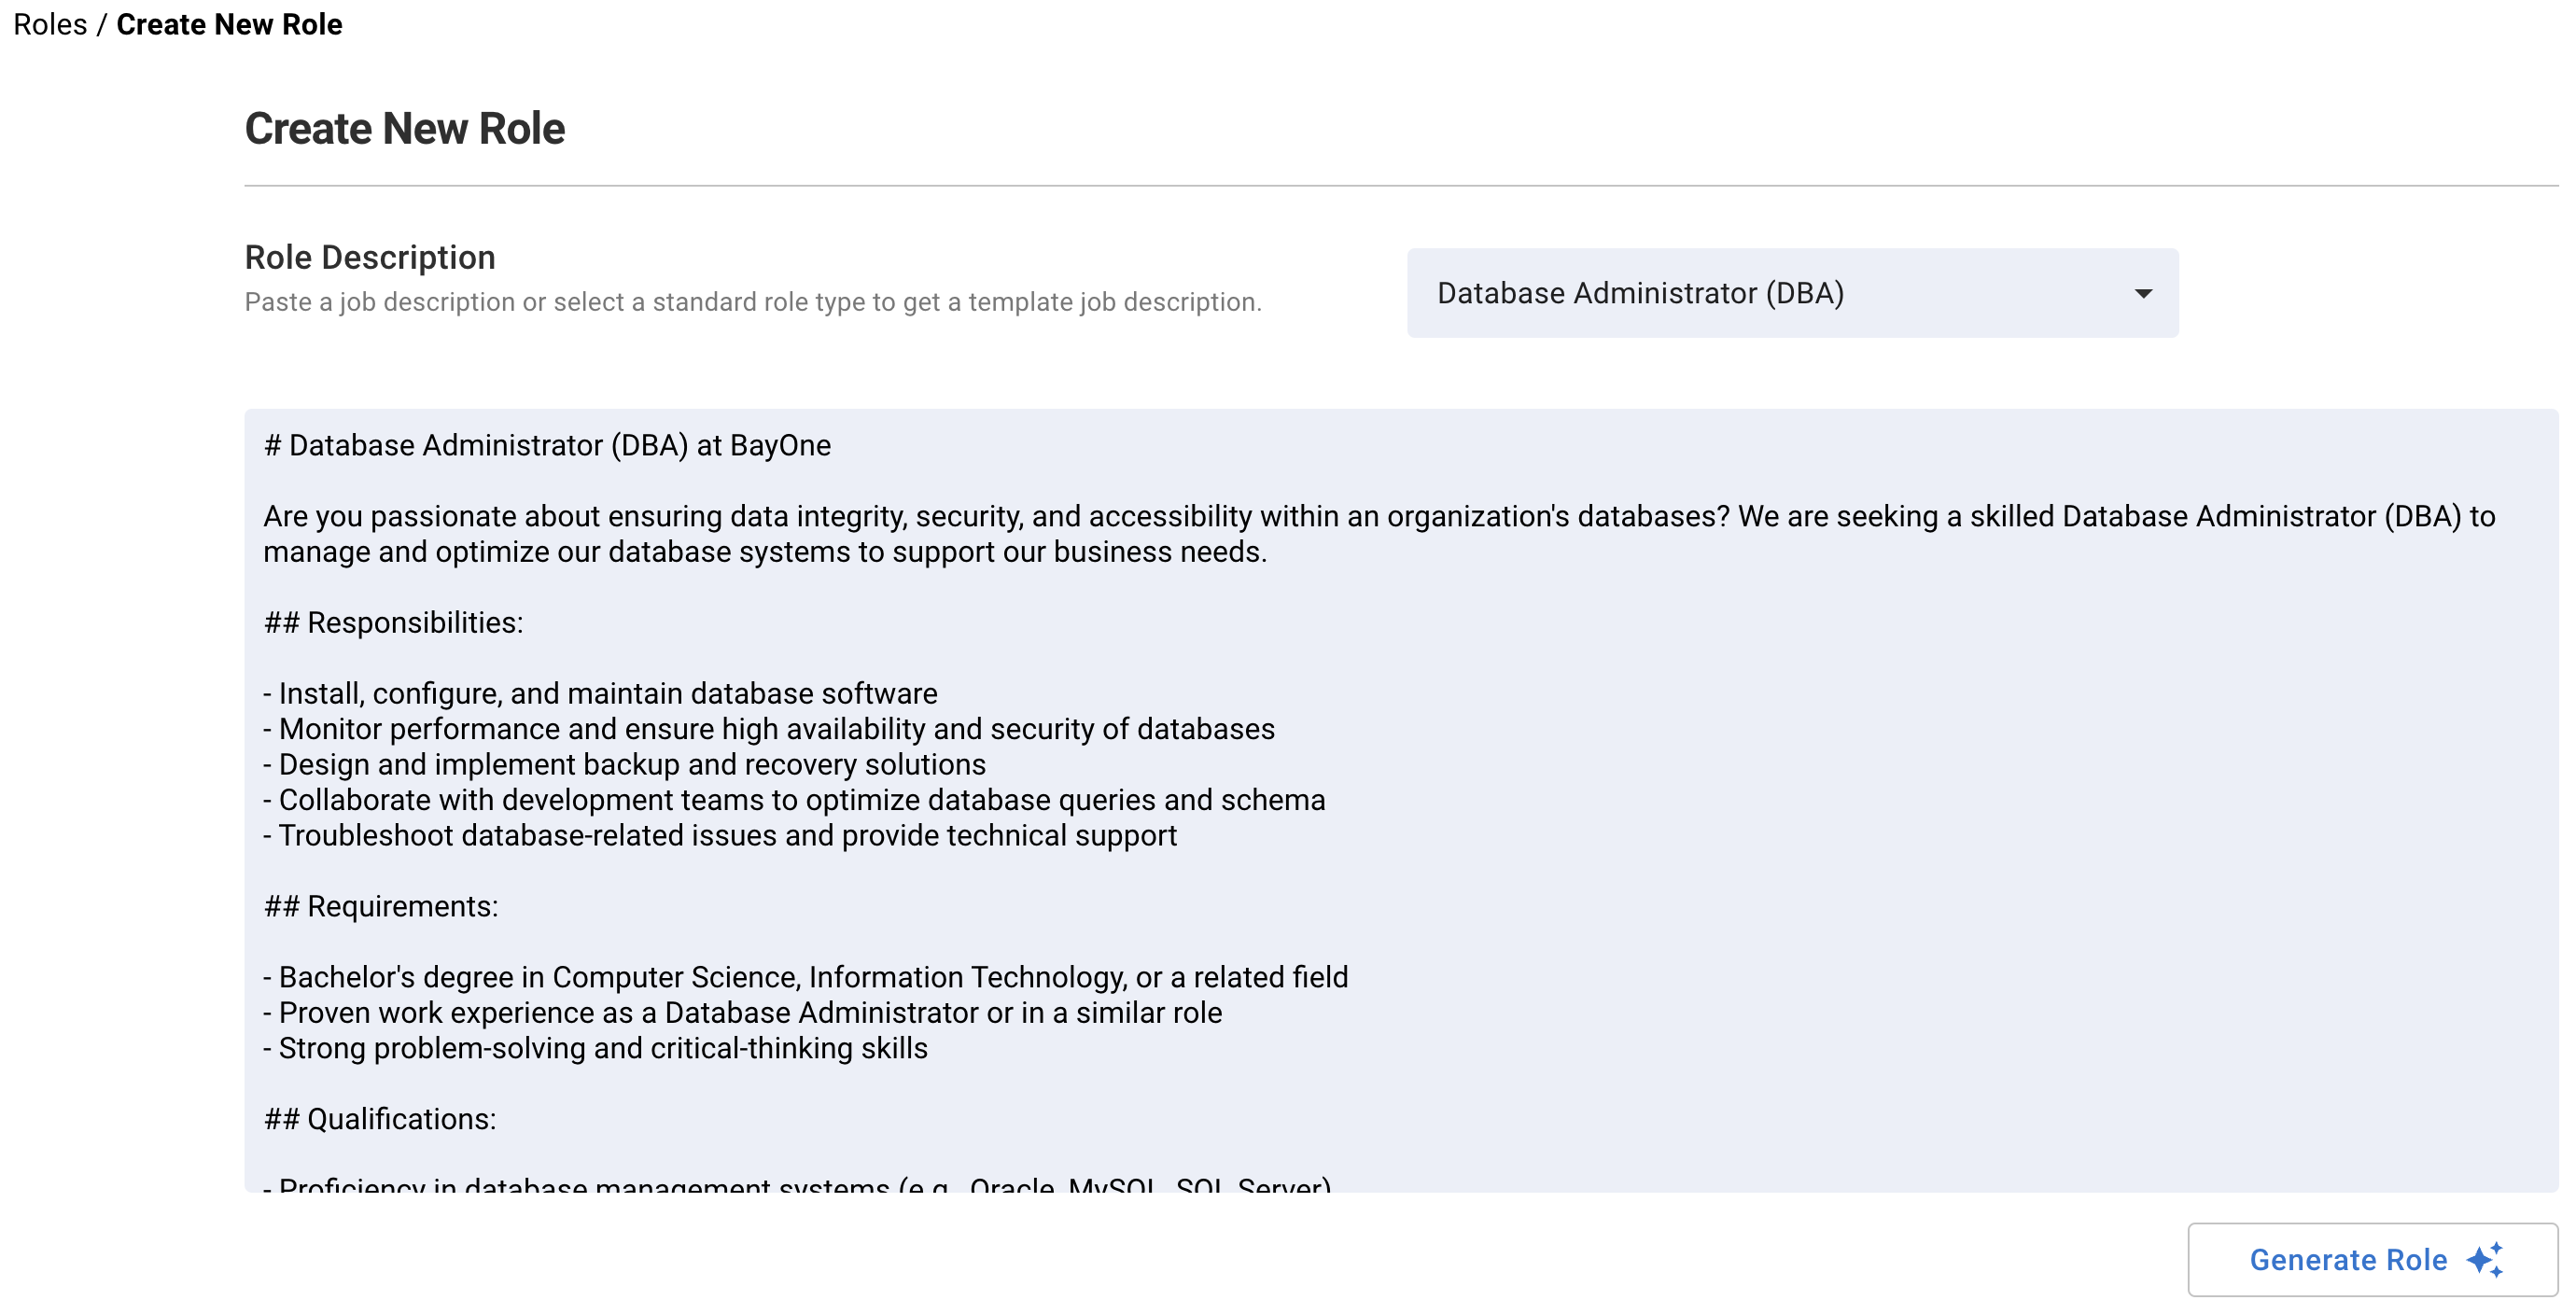
- Click on Create Role to navigate to Create a New Role page.
- In the text area, Paste a Job Description, or from the Role description dropdown select a readily available job description from over thirty predefined technical roles.
If you don’t have a job description handy, choose a technical role from the Role description dropdown that is the closest match to your role. Skim through this standardized job description and edit any requirements or skills as per your need. Our AI engine will parse the job description to determine all the required attributes.
- Click on the Generate Role button to let our AI pull out all the relevant information from the role and fill out the form for you.
- As our AI fills in the form, validate the role attributes and edit if required. Role Title needs to be unique. If its not unique an error message will be presented. You will need to edit so that the title is unique.
Be descriptive in naming the job role. Here are some examples: Database Admin (DBA) Q2 2024, HP Database Administrator Q2’24
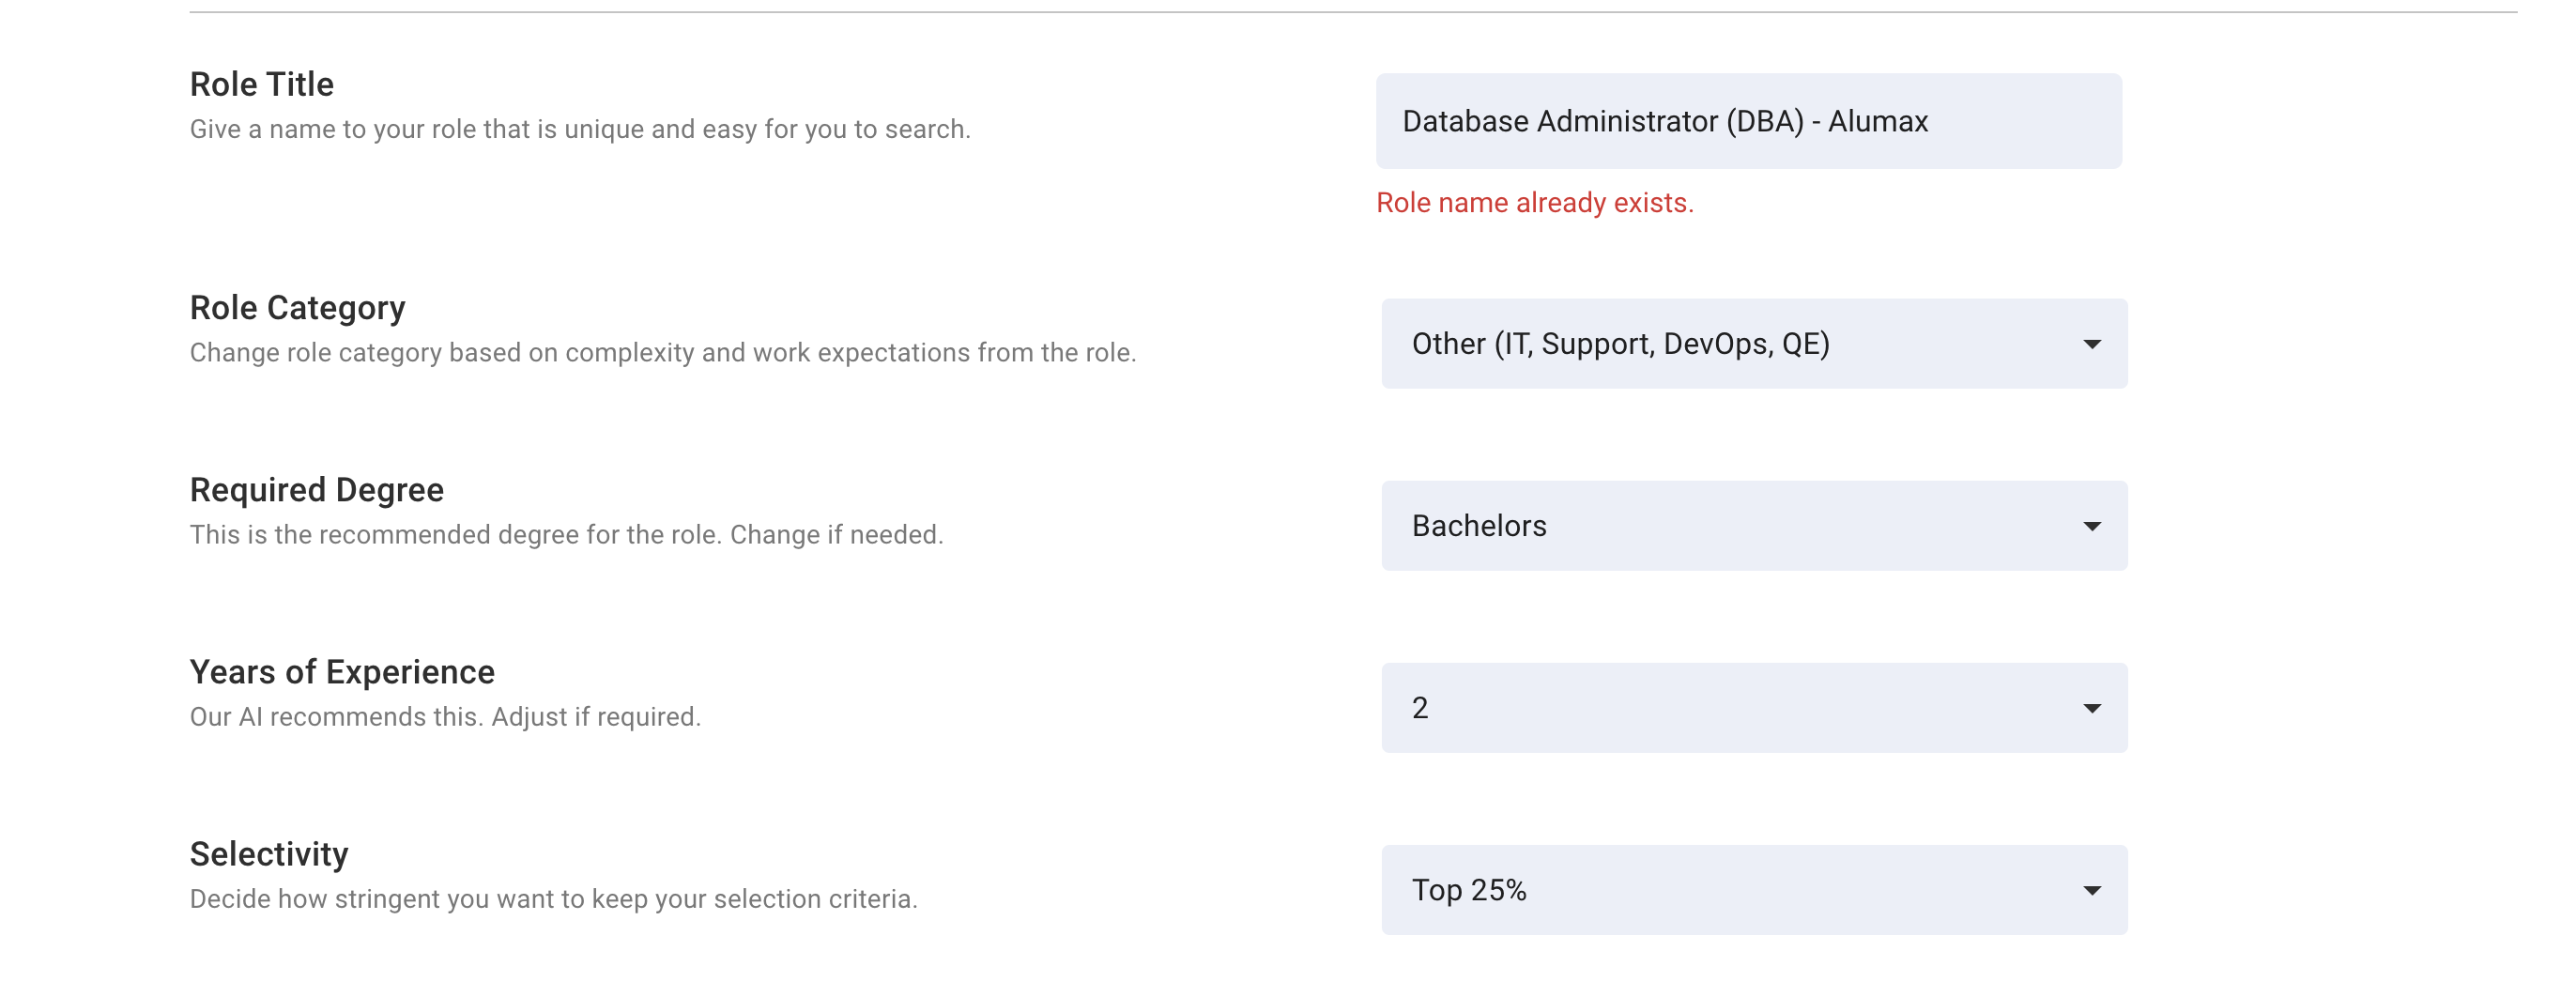
Choose Selectivity value to determine how stringent you want to keep your selection criteria. A Selectivity of 20% means that the candidate those who cross the target score will belong to the global pool of top 20% candidates.
- Next verify the Coding Languages selection. AI will pick the coding languages found in the job description. You can choose more than one coding language. This is the set of coding languages you make available to the candidate during the coding test. Candidate will be able to choose any one of these languages while solving the coding problems. If no Coding Languages are selected then test will not contain a Coding Section.
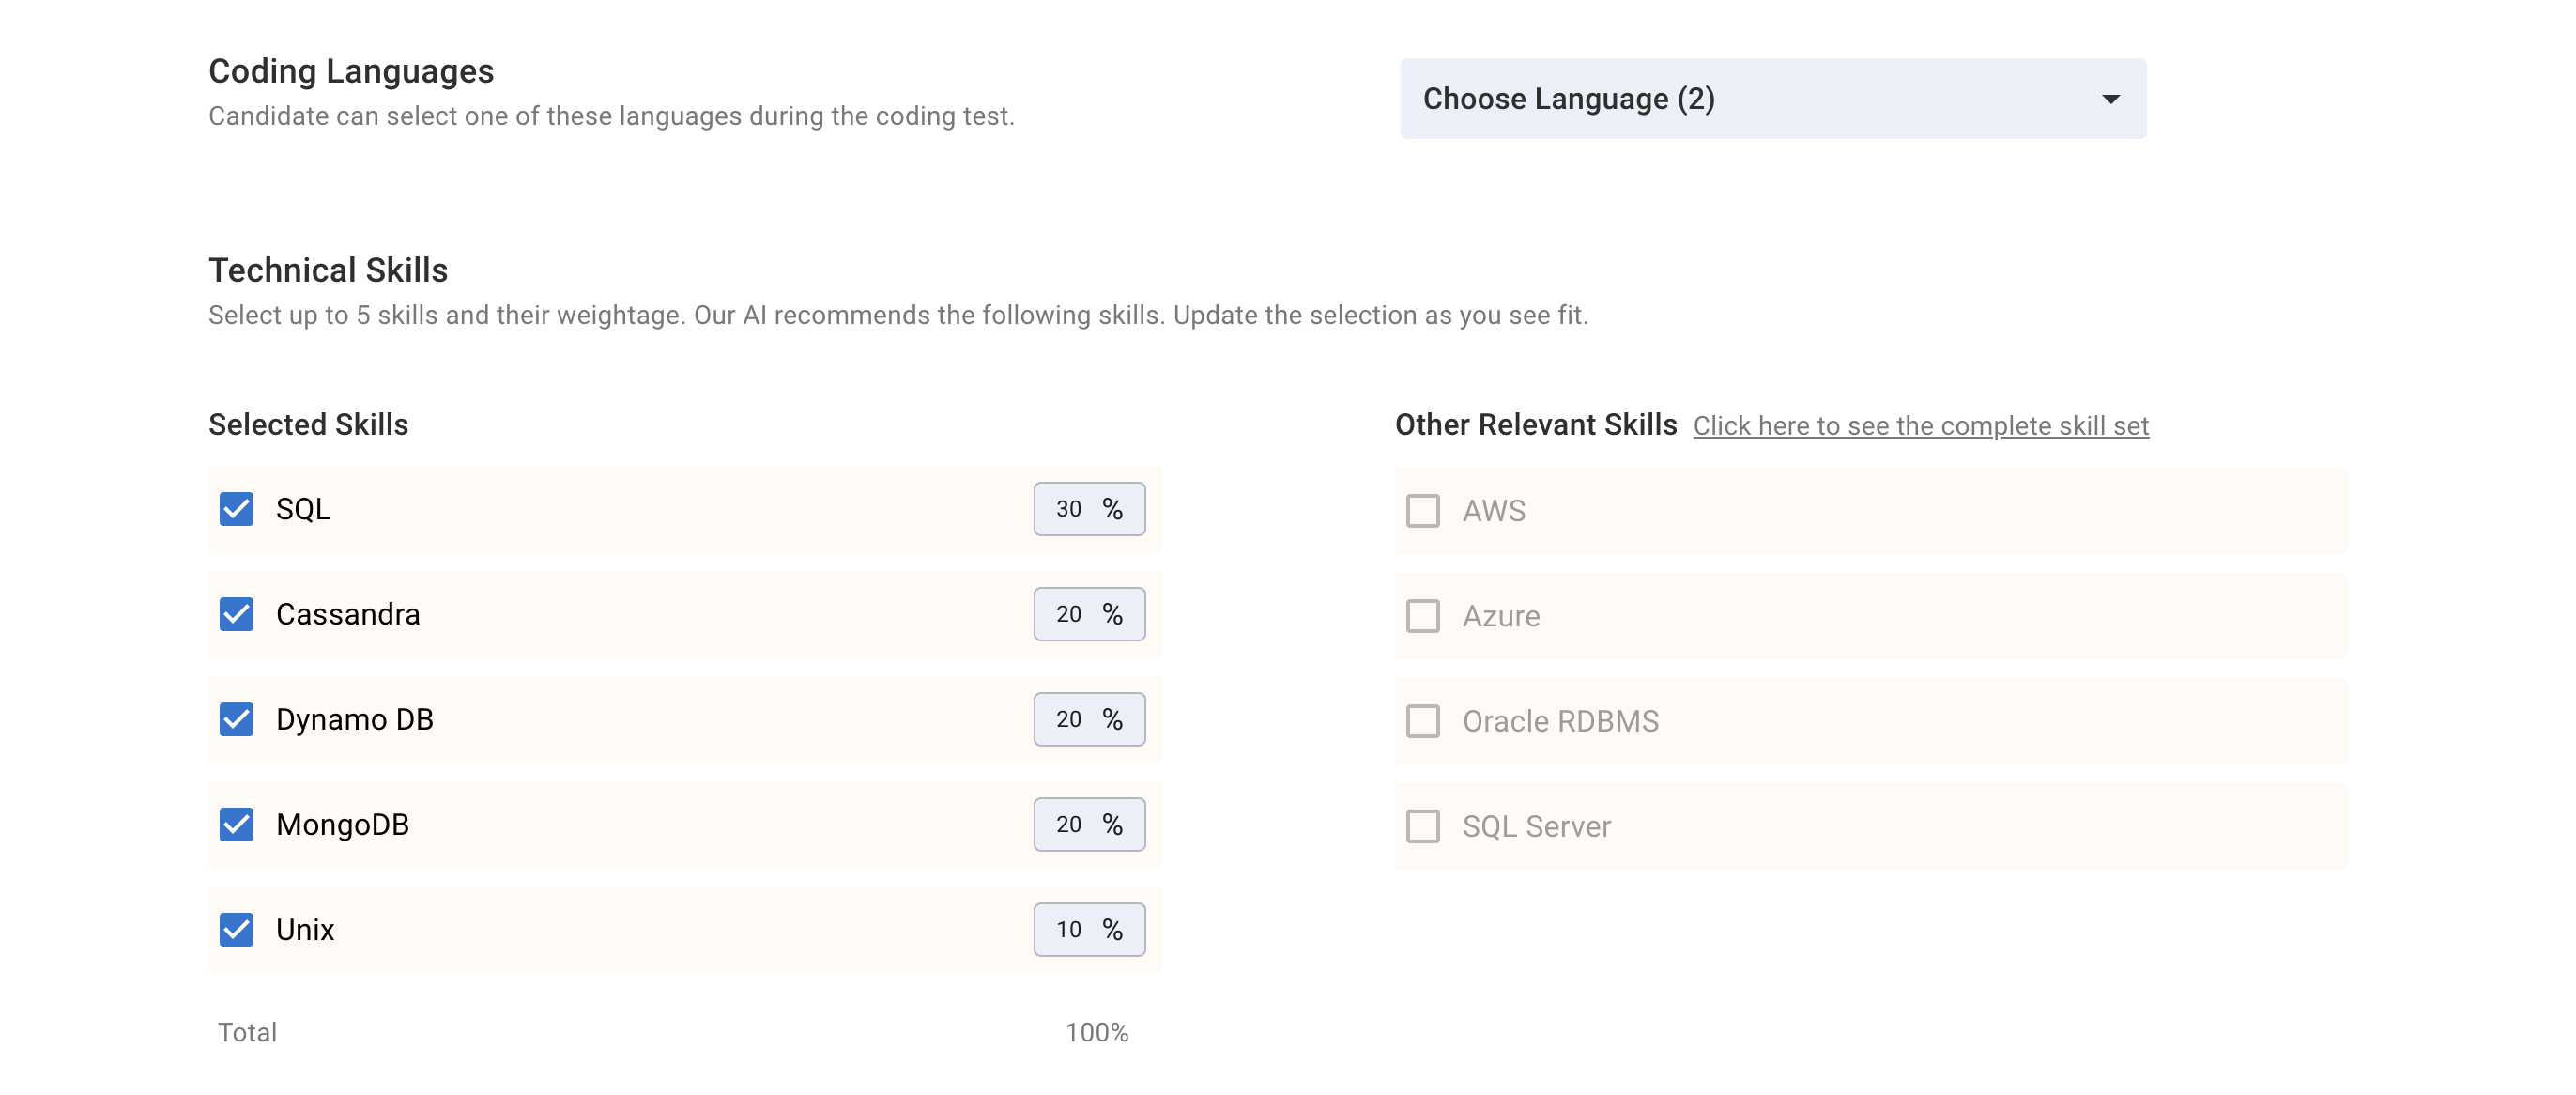
- In the Technical Skills section, you will find recommendation for skills to be tested in the Role Type assessment invite based on job description. The left column contains up to 5 Selected Skills with weightage for each skill. Candidate’s profile and technical skills evaluation will be based on the skills listed here. The right column contains Other Relevant Skills. You can unselect skills from the left column and select skills from the right column, if you want to make changes to AI recommendations. Weightage must add up to 100%
We offer about 50 different technical skills but the two columns only show the skills that were present in the job description and are supported by TechScore. You can see the complete list of skills that we support by clicking on Click here to see the complete skill set. You may select more skills from this list and add to Other Relevant Skills before making a final decision.
- Scroll down to the Sections Included in the Test section. Here you decide which sections will go into your assessment invite for this job role. The Profile Section is mandatory and requires only a resume. At least one of the Coding Section and the Technical Section is also mandatory. We recommend keeping all four sections selected for the most comprehensive assessment and report.
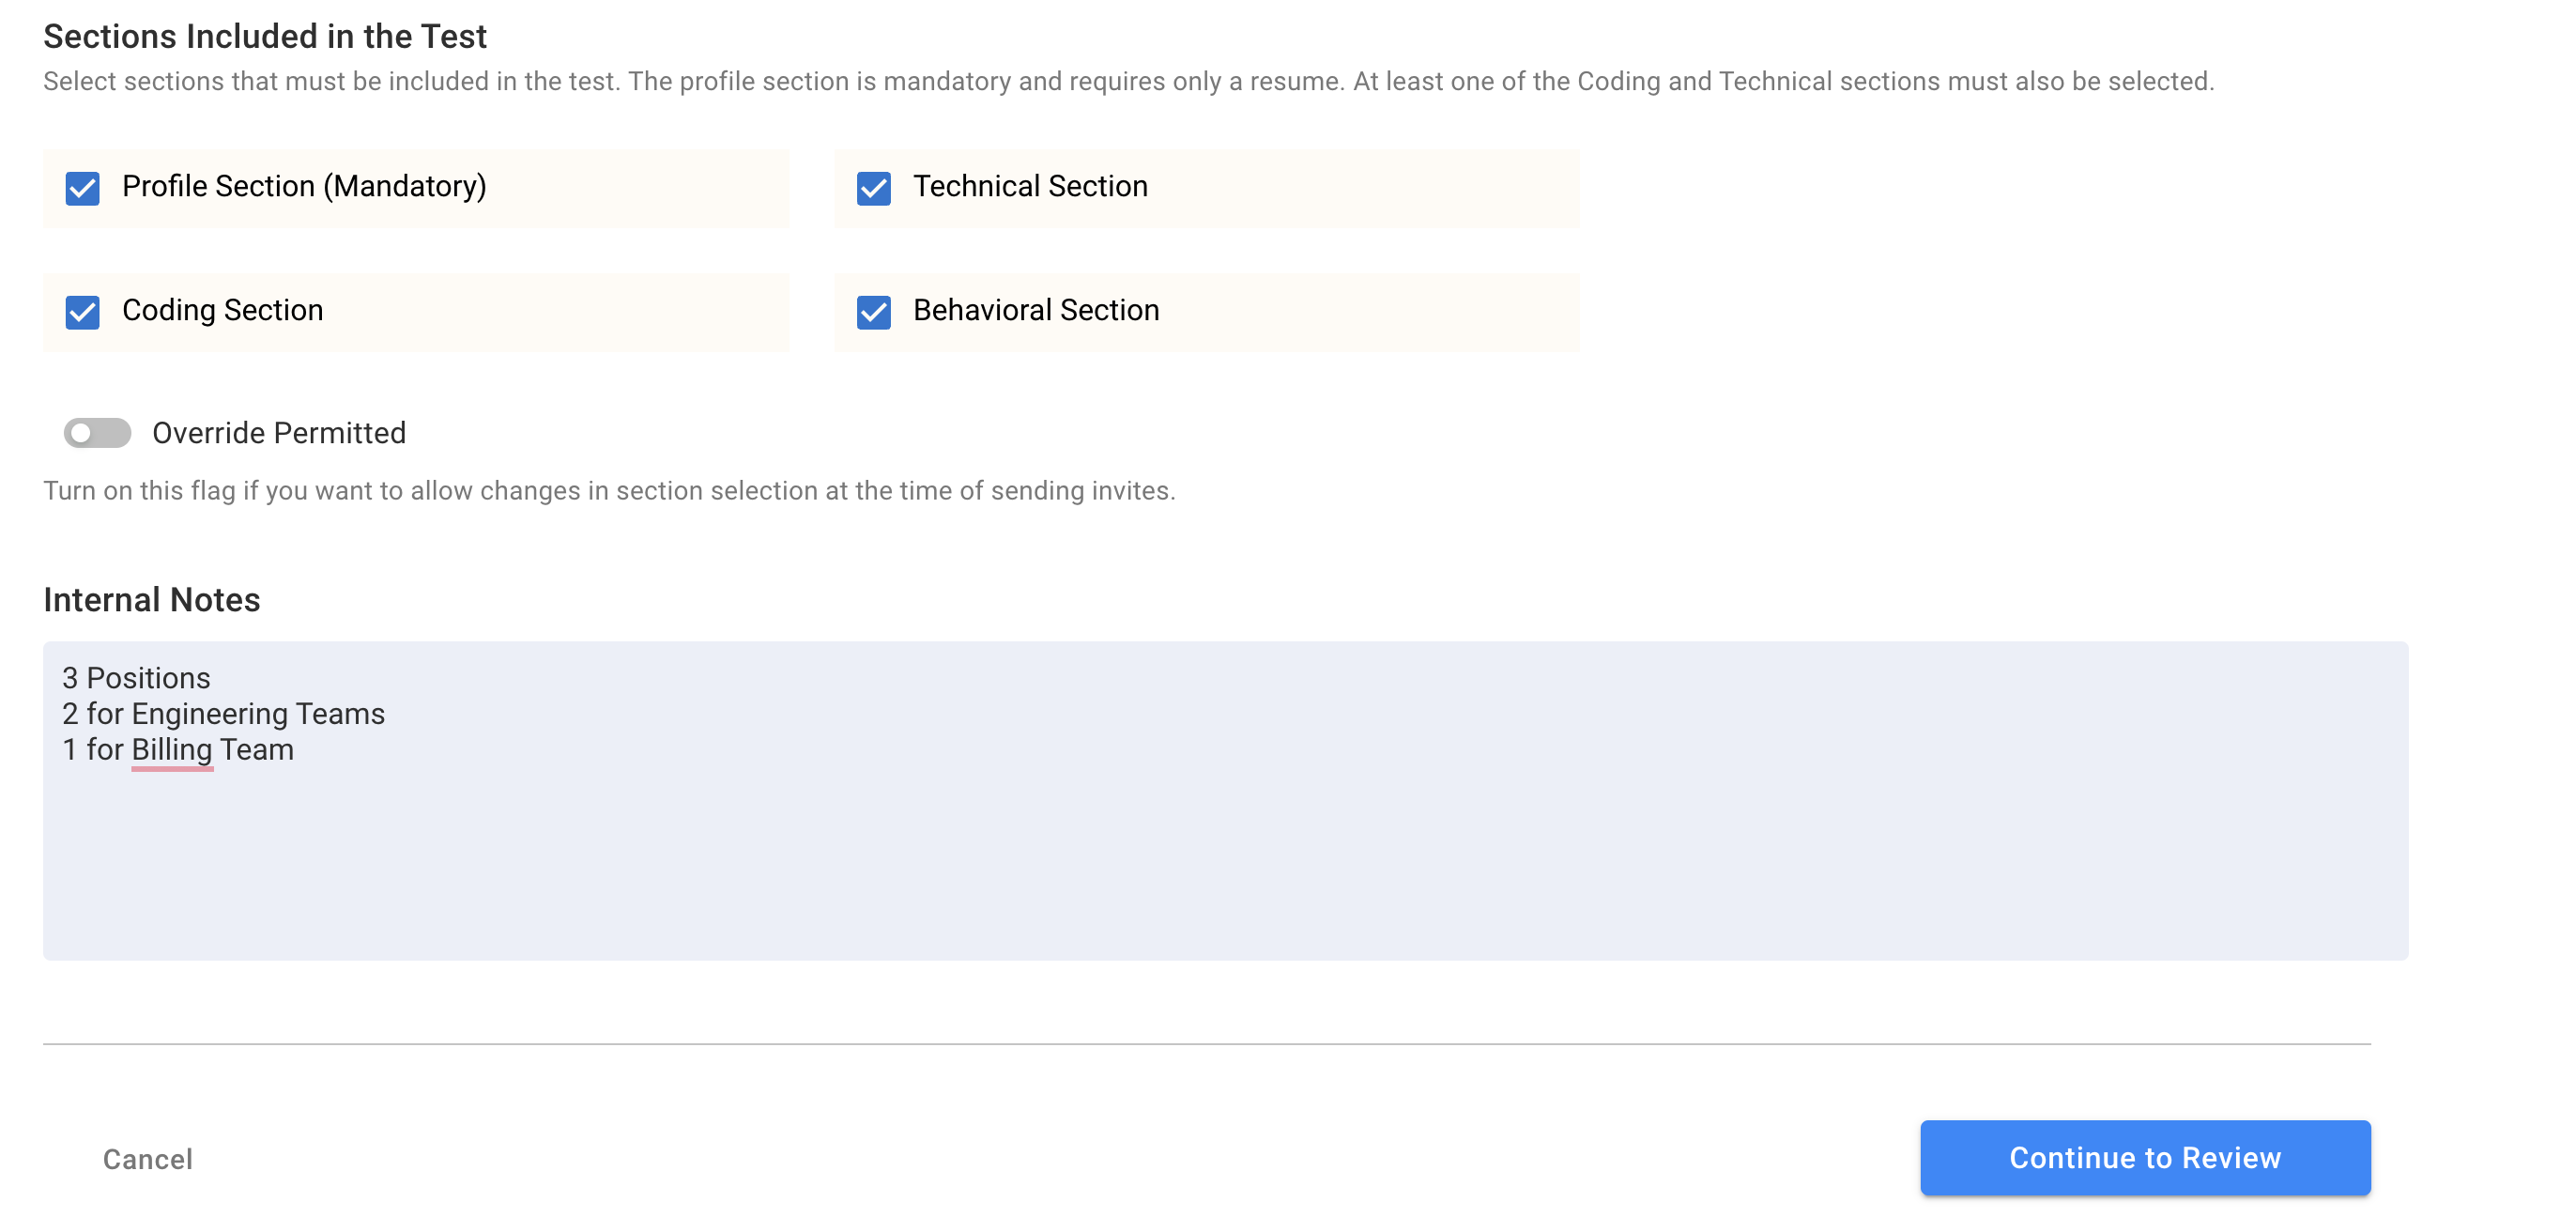
Turn on Override permitted if you want to change testing sections at the time of sending an invite.
- Add an optional note for any internal purposes in the Internal Notes text area. Only your team can see this note.
- Click Continue to Review to preview the Role Summary before publishing it.
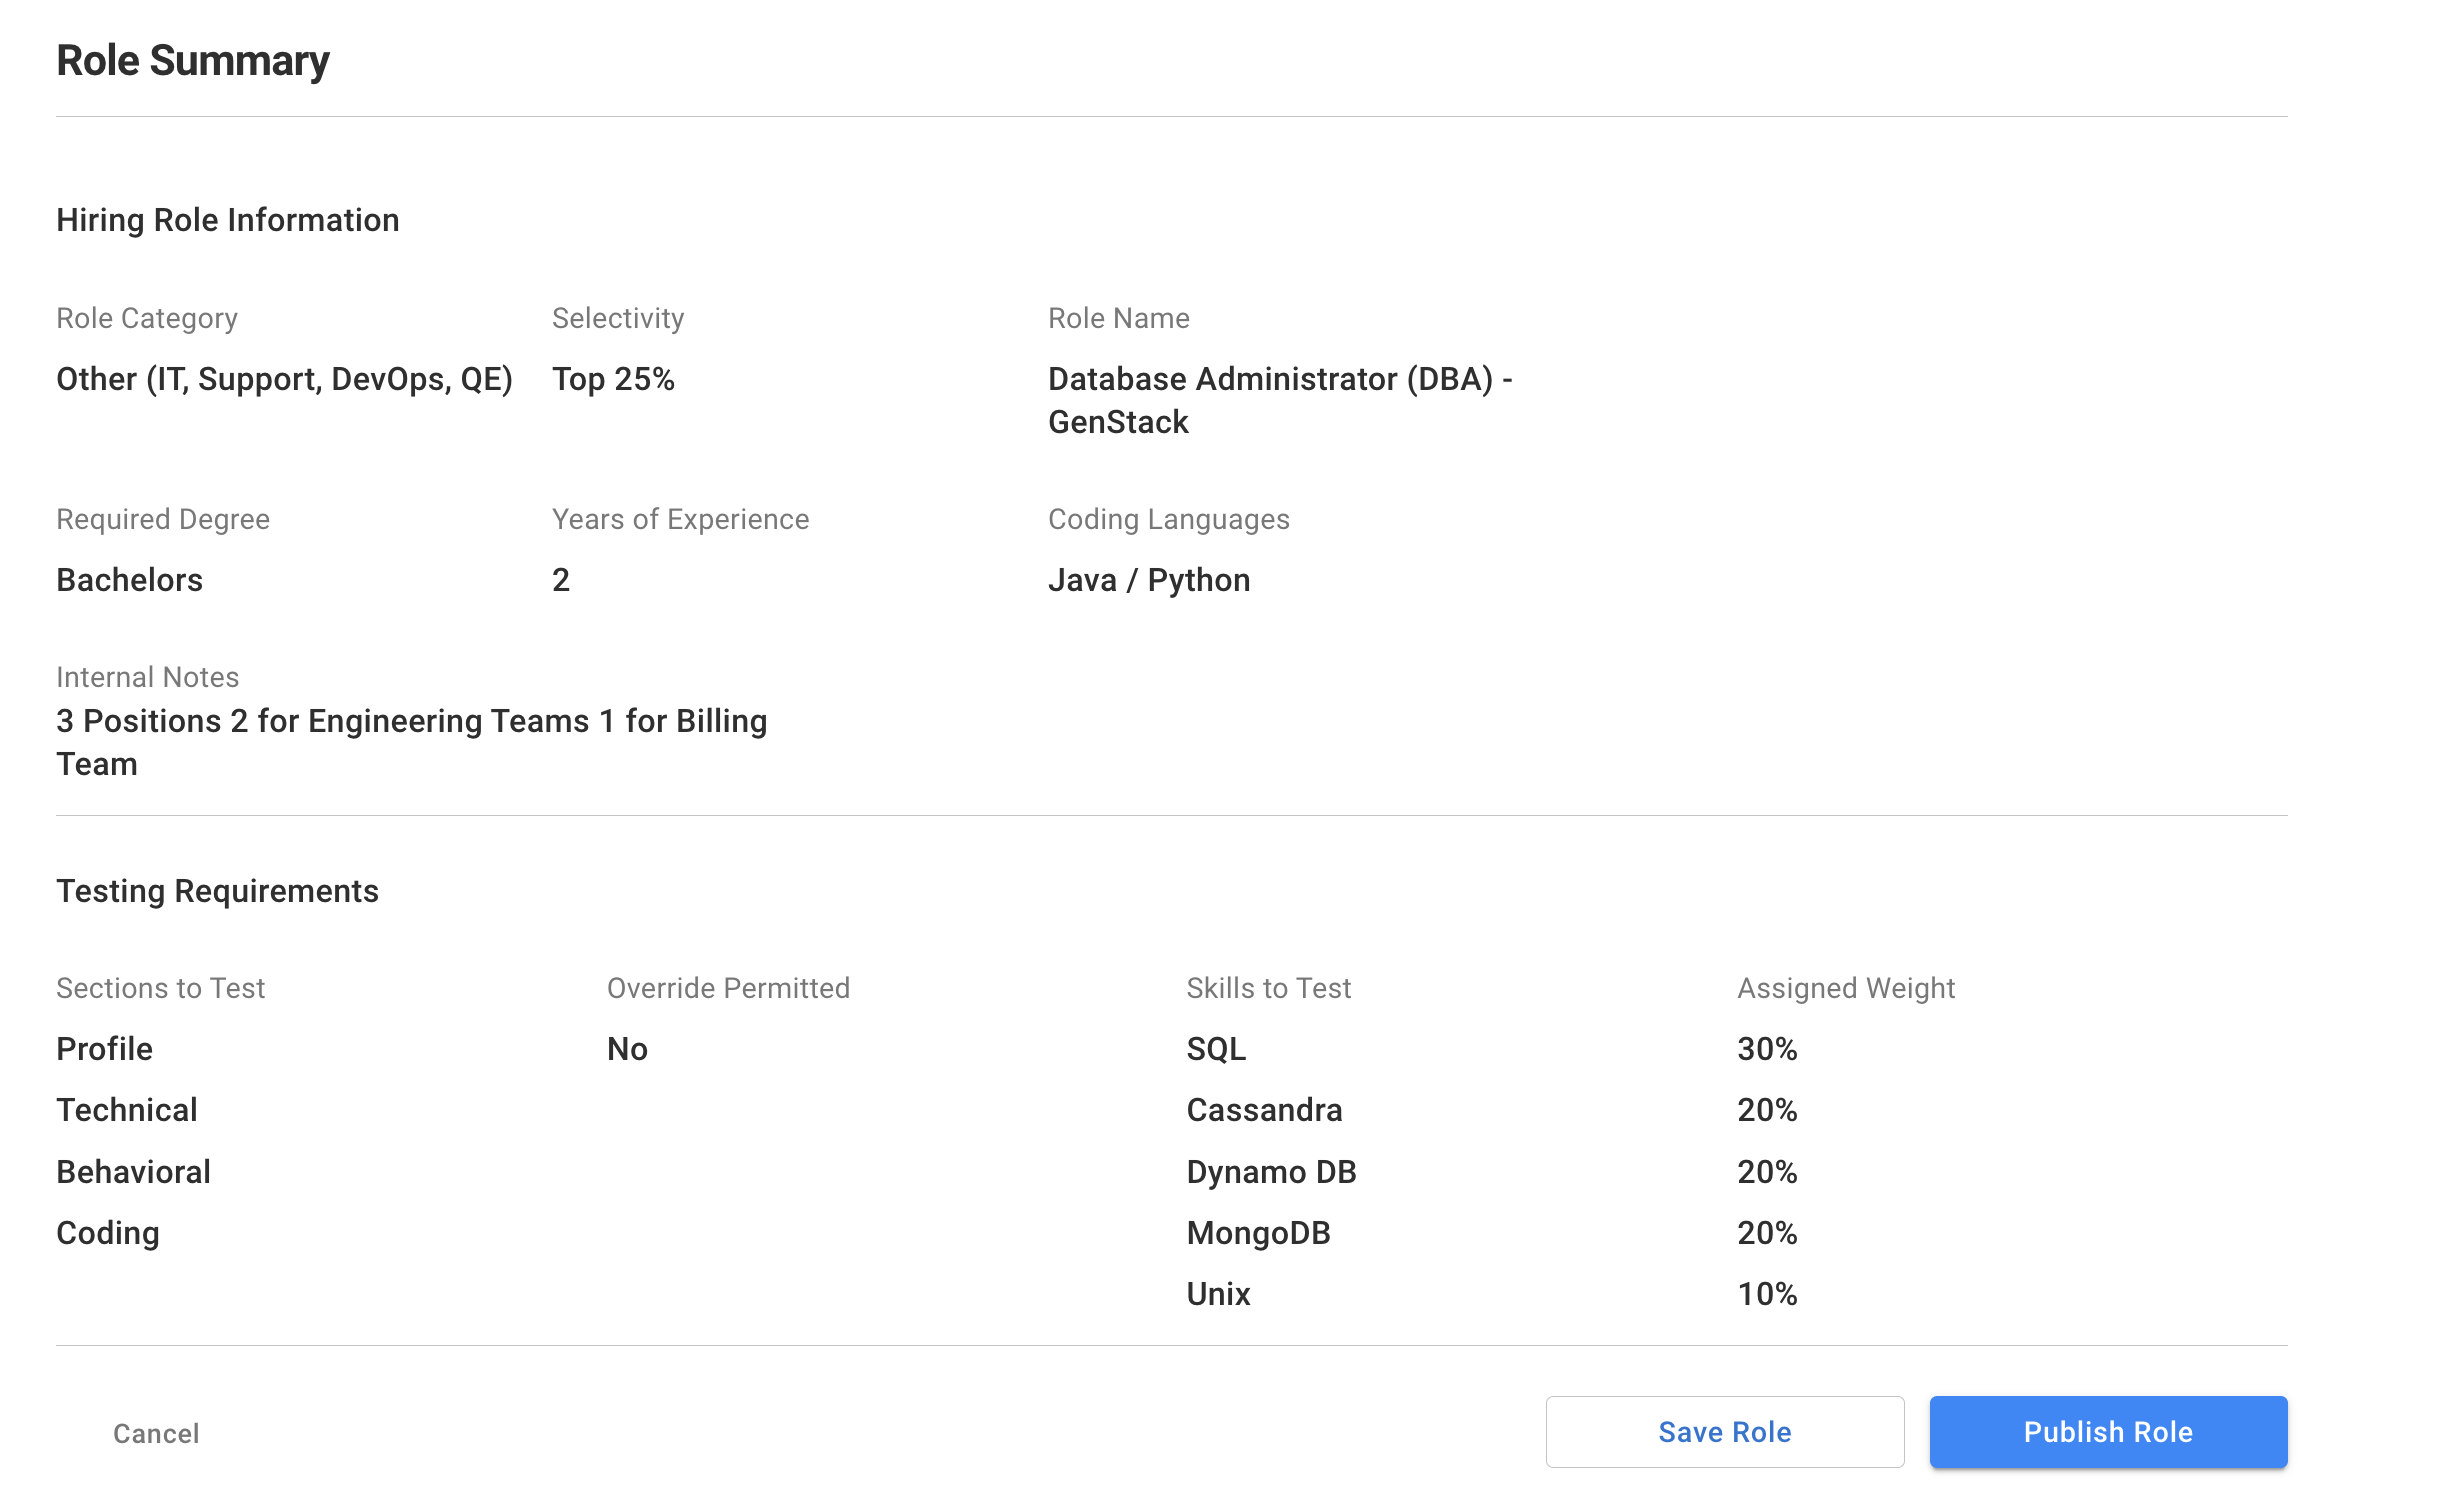
- You can click on Save Role to save the role in Draft mode, or you can click on Publish Role to publish and activate the role. You can only send assessment invites for active roles. Roles saved as drafts can be edited but once published cannot be edited.
- Once your job role is published and active it is ready for inviting candidates for a comprehensive assessment.
- Our AI engine calculates the standardized Target Score for this role, which sets the benchmark for a candidate’s performance. Candidates, who achieve the Target Score in TechScore’s comprehensive assessment invites are highly likely to perform in the targeted job role.

2. Add a Candidate
You need to add a candidate before you can invite them to assessments for the job roles.
- Navigate to the Candidates page.
- Click on the Add Candidate button to navigate to the New Candidate page.
- Upload a resume by clicking on the Candidate Resume box. Our AI engine will fetch and fill in all the information for you. You may correct any field if required.
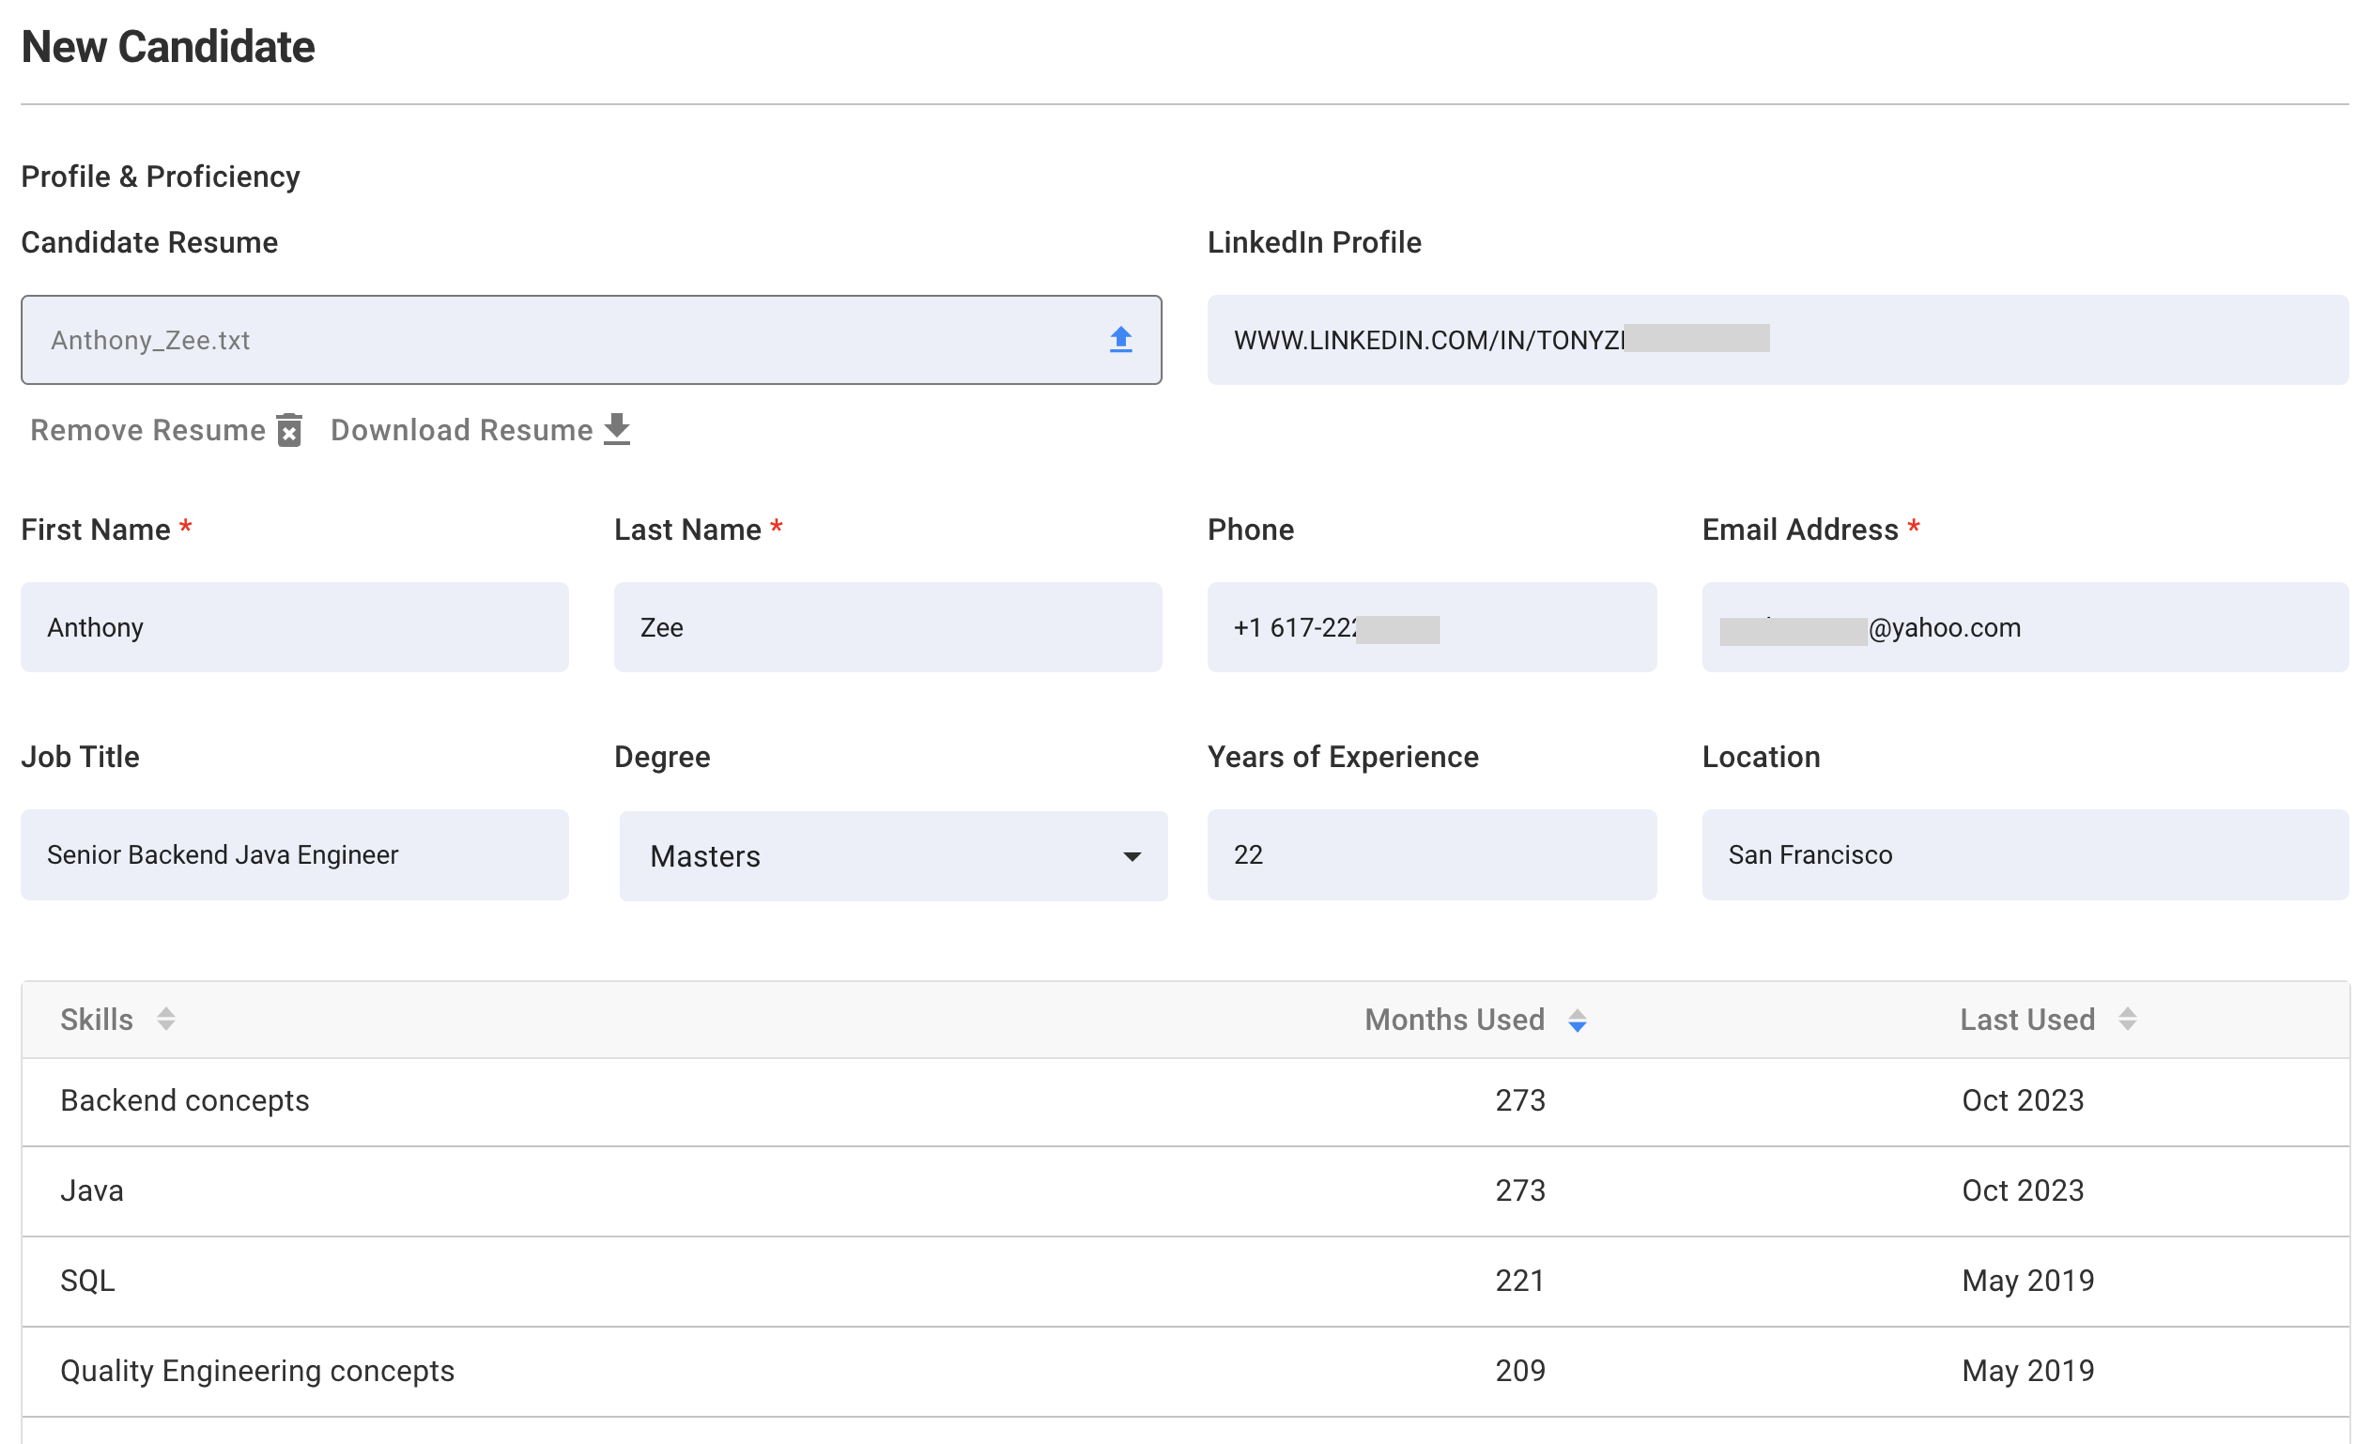
- The Technical Skills table shows all the skills captured from the resume. We support over 50 technical skills. Scroll down the table to update or add Month Used and Last Used values.
Filling in all the fields and maintaining a complete skill record will ensure you have a good candidate pool to refer to in the future.
- Add any optional Internal Notes for your team’s reference and click on the Add Candidate button to save the candidate.
3. Send an Assessment Invite
If you have created a job role and added a candidate on TechScore, you are ready to invite the candidate for a comprehensive assessment.
- Navigate to the Invites page
- From the Roles table select a role by clicking anywhere on the row. To see role details click on the 3-dots icon after the last column.
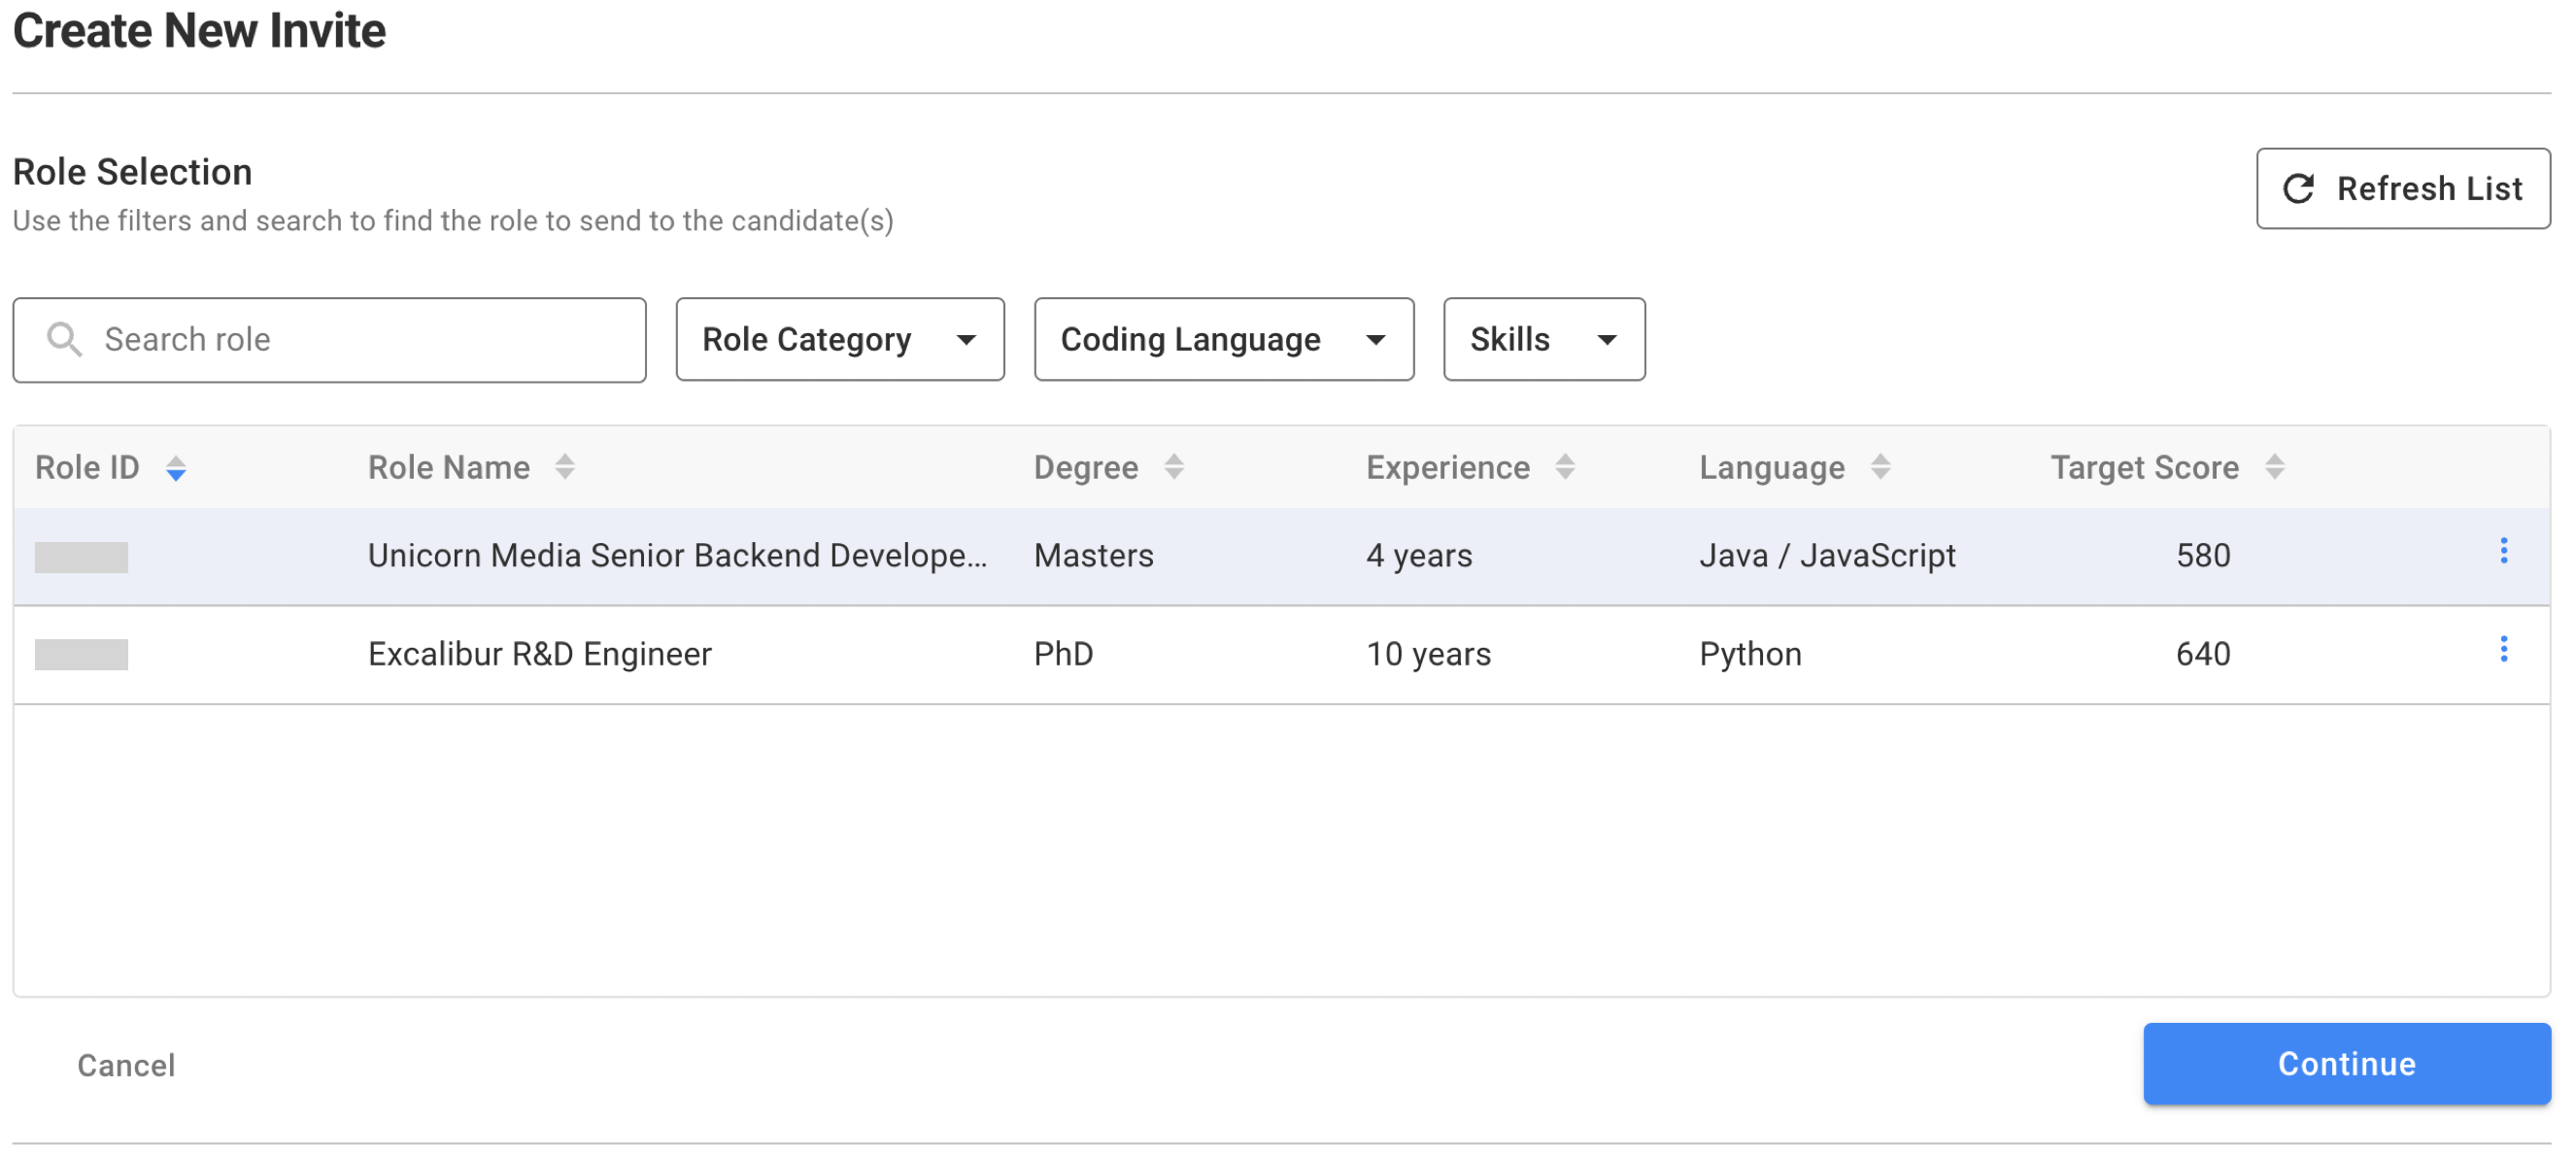
- Click Continue to jump to the Test Requirements section.
- Make any changes if necessary. The default Test Expiration Date is set to 7 days from now.
Selecting all four sections will yield the most dependable Invite Report.
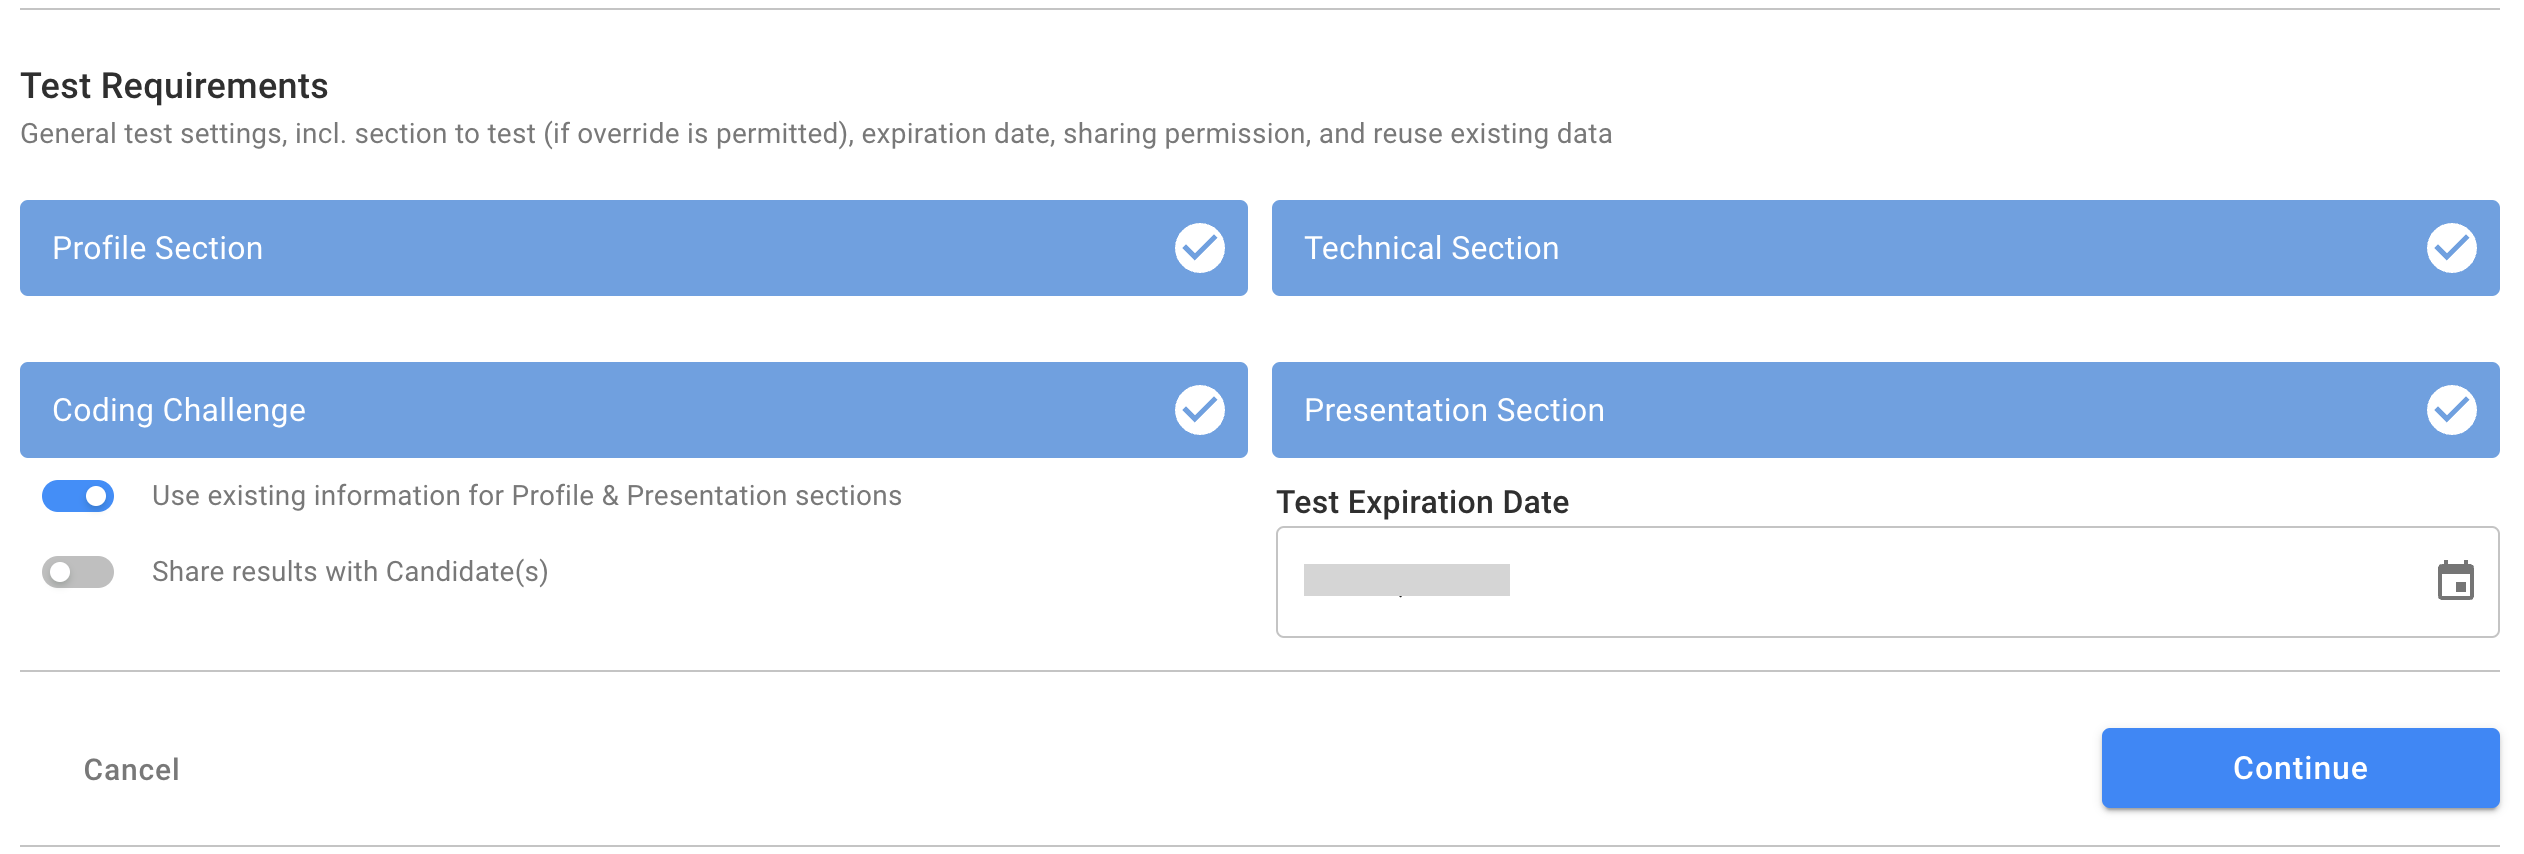
- Click Continue to move to the Candidate Selection section.
- Click on Candidate rows to add them to the Invite List. You can invite up to 10 candidates in one batch of invites, subject to the available invite credits.
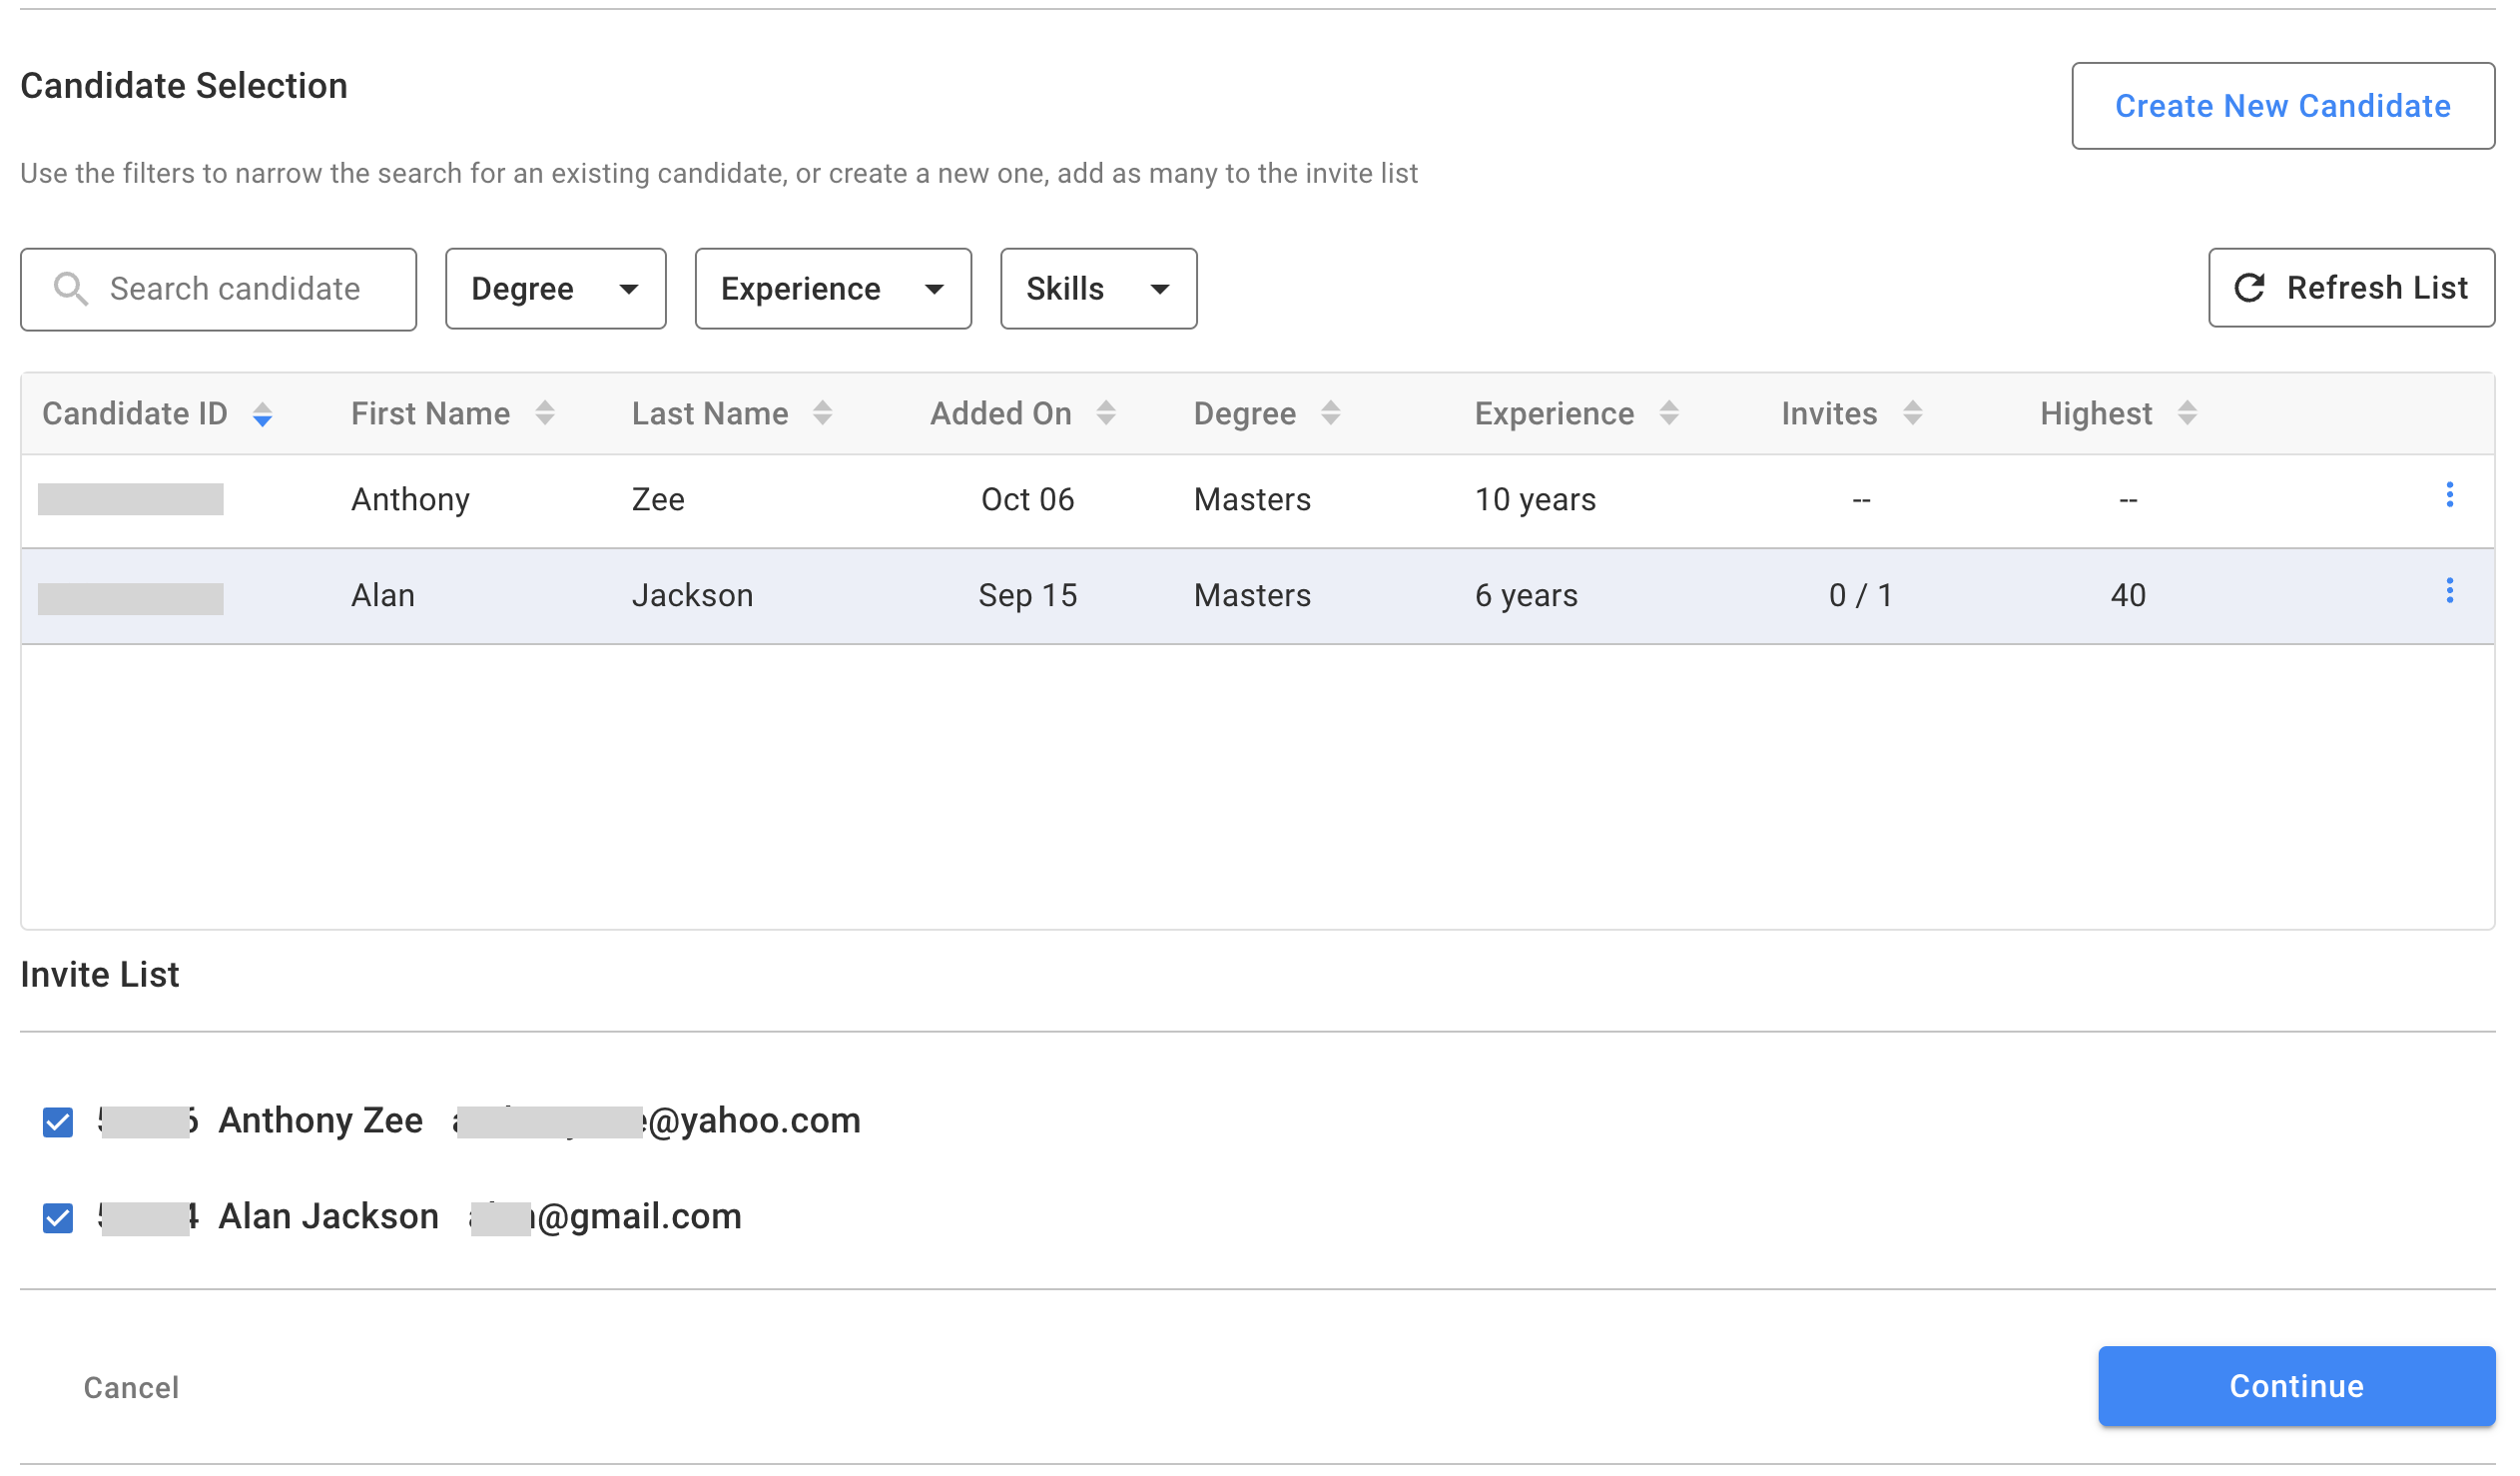
- Click Continue to move to the Invite & Internal Notes section. Fill in any optional Message to the candidate which will be added to the Invite email. Add any Internal Notes for your team.
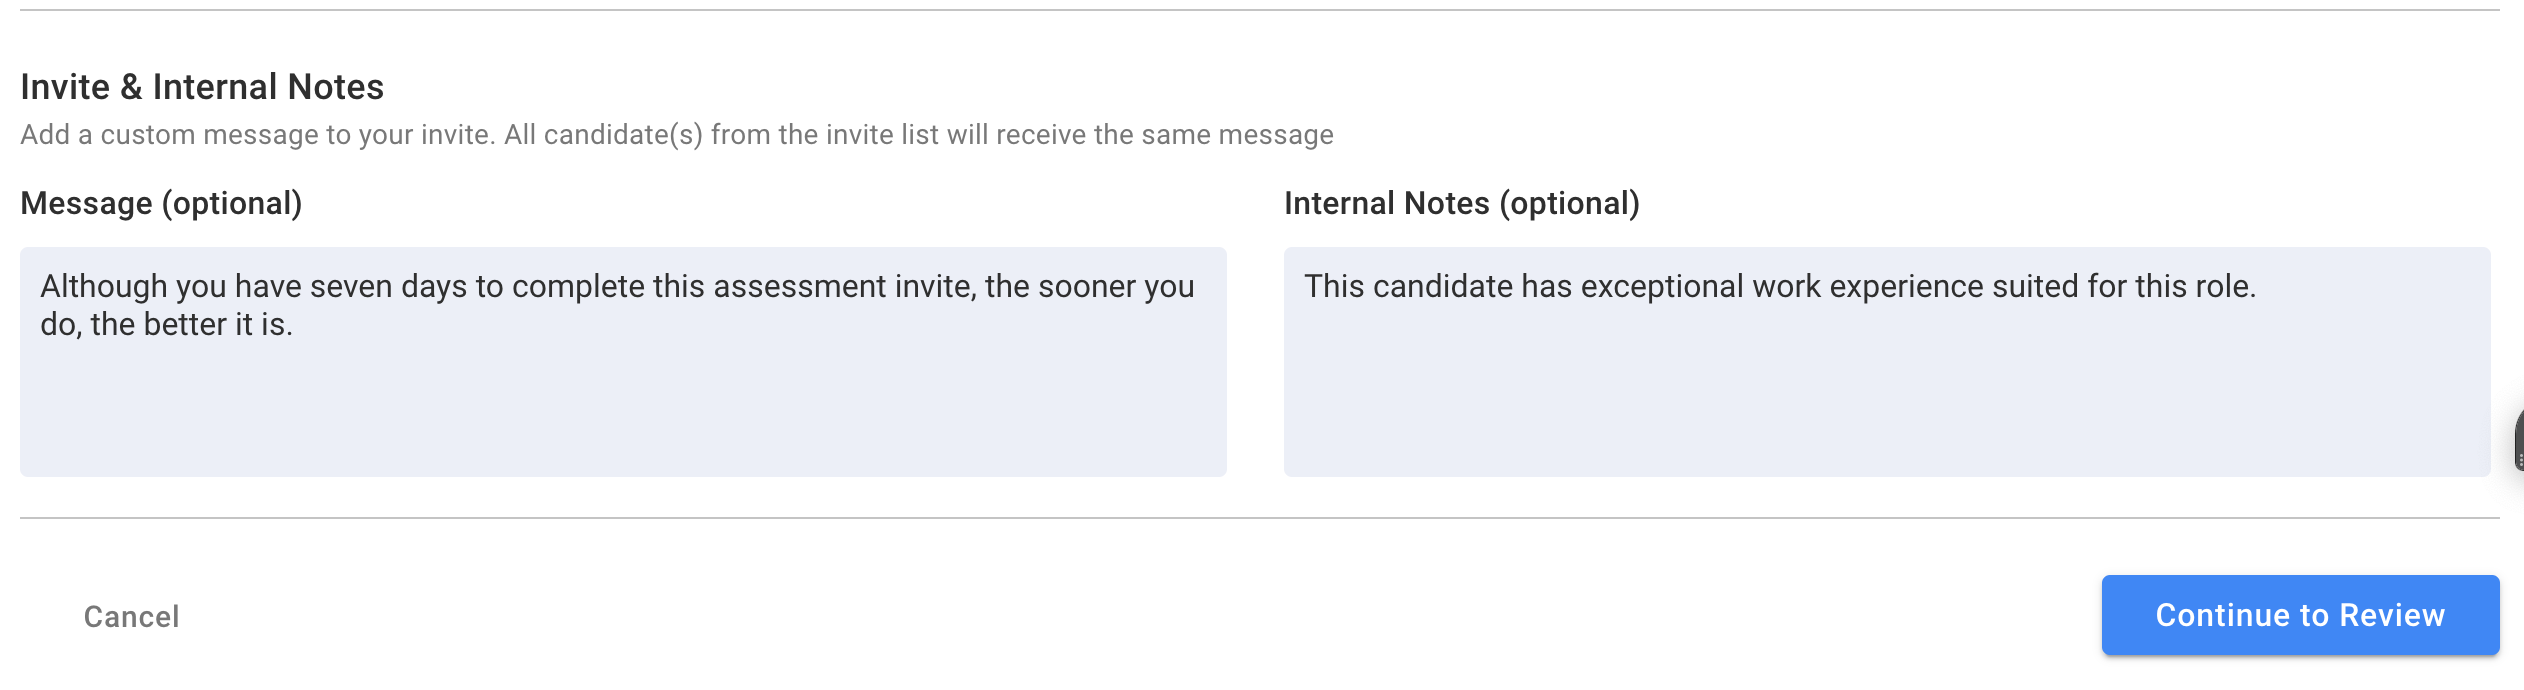
- Click Continue to Review to verify your selections. Finally, click the Send Invite to List button to invite all the candidates for the assessment.

- Candidates receive invites in their email inbox with a link and an access code. We also send them an SMS, if a valid US phone number was provided when adding the candidate. Emails are sent from no.reply@techscore.ai.
- Click on Back to All Invites. You can see the sent invites on the Invites page.
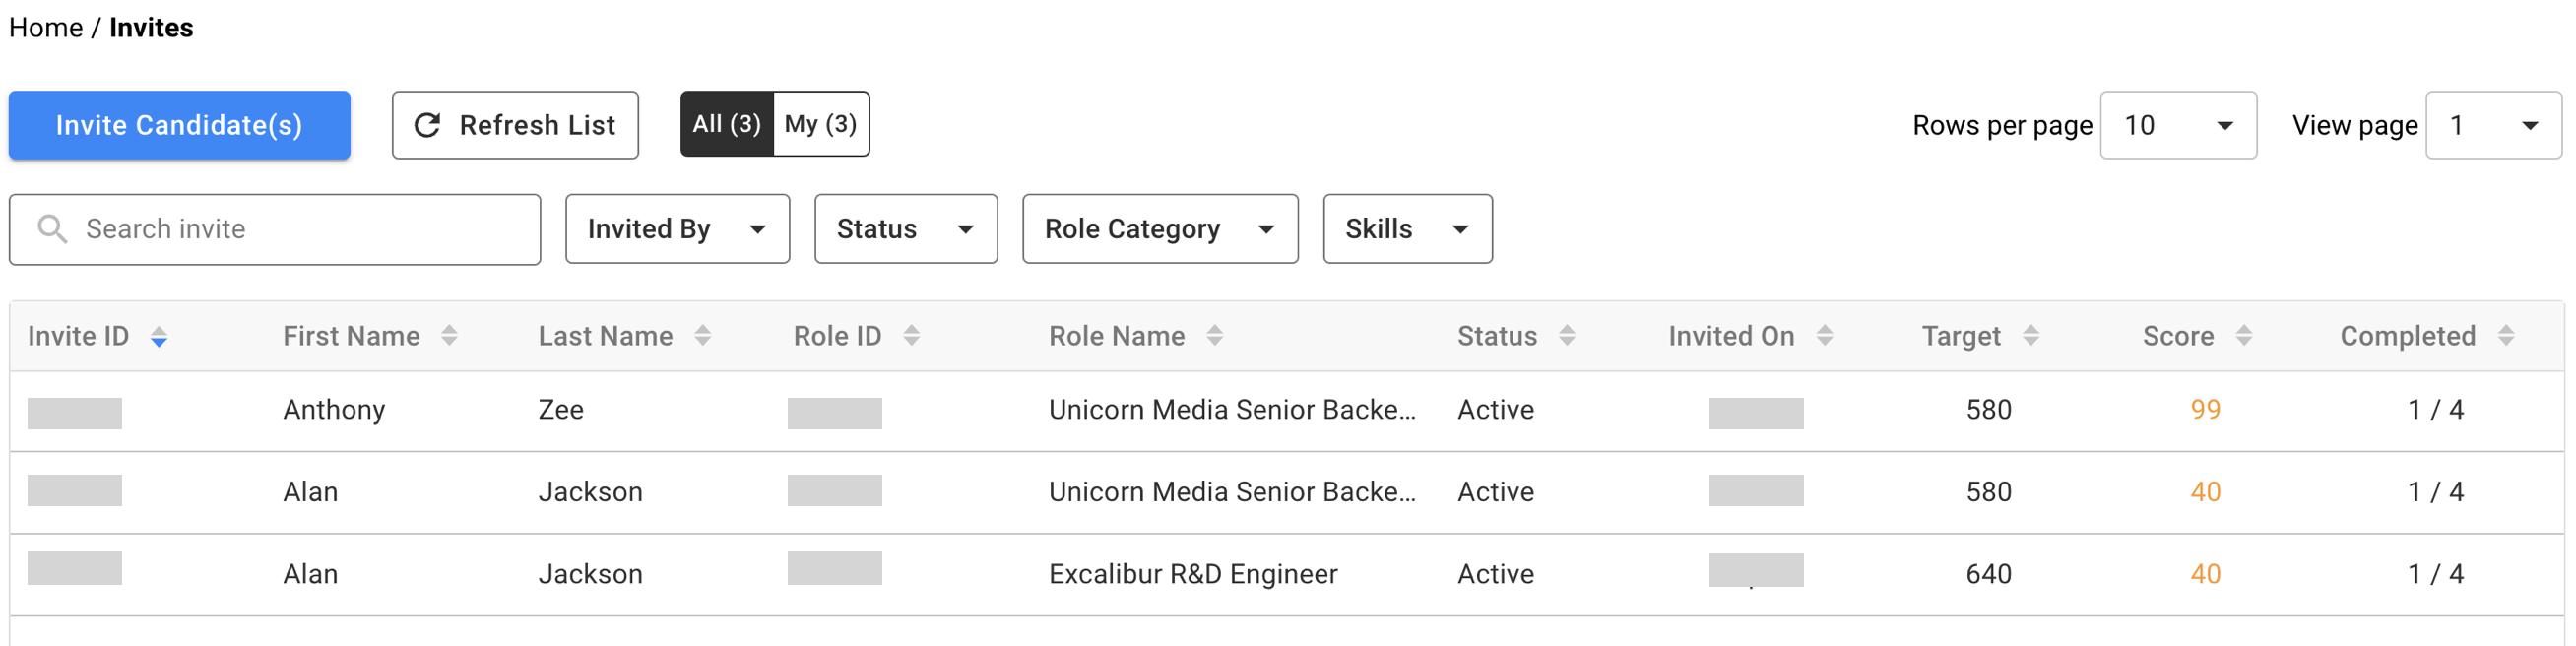
- Now you can click on any invite row to monitor its progress, see the assessment result, send reminders, or extend the expiry date.
4. Candidate completes Assessment Invite
Just sit back and relax while the candidate completes the invite. You can monitor their progress and send them reminders if necessary. To monitor candidate activity, navigate to the Invites page and then click on the invite row on the table.
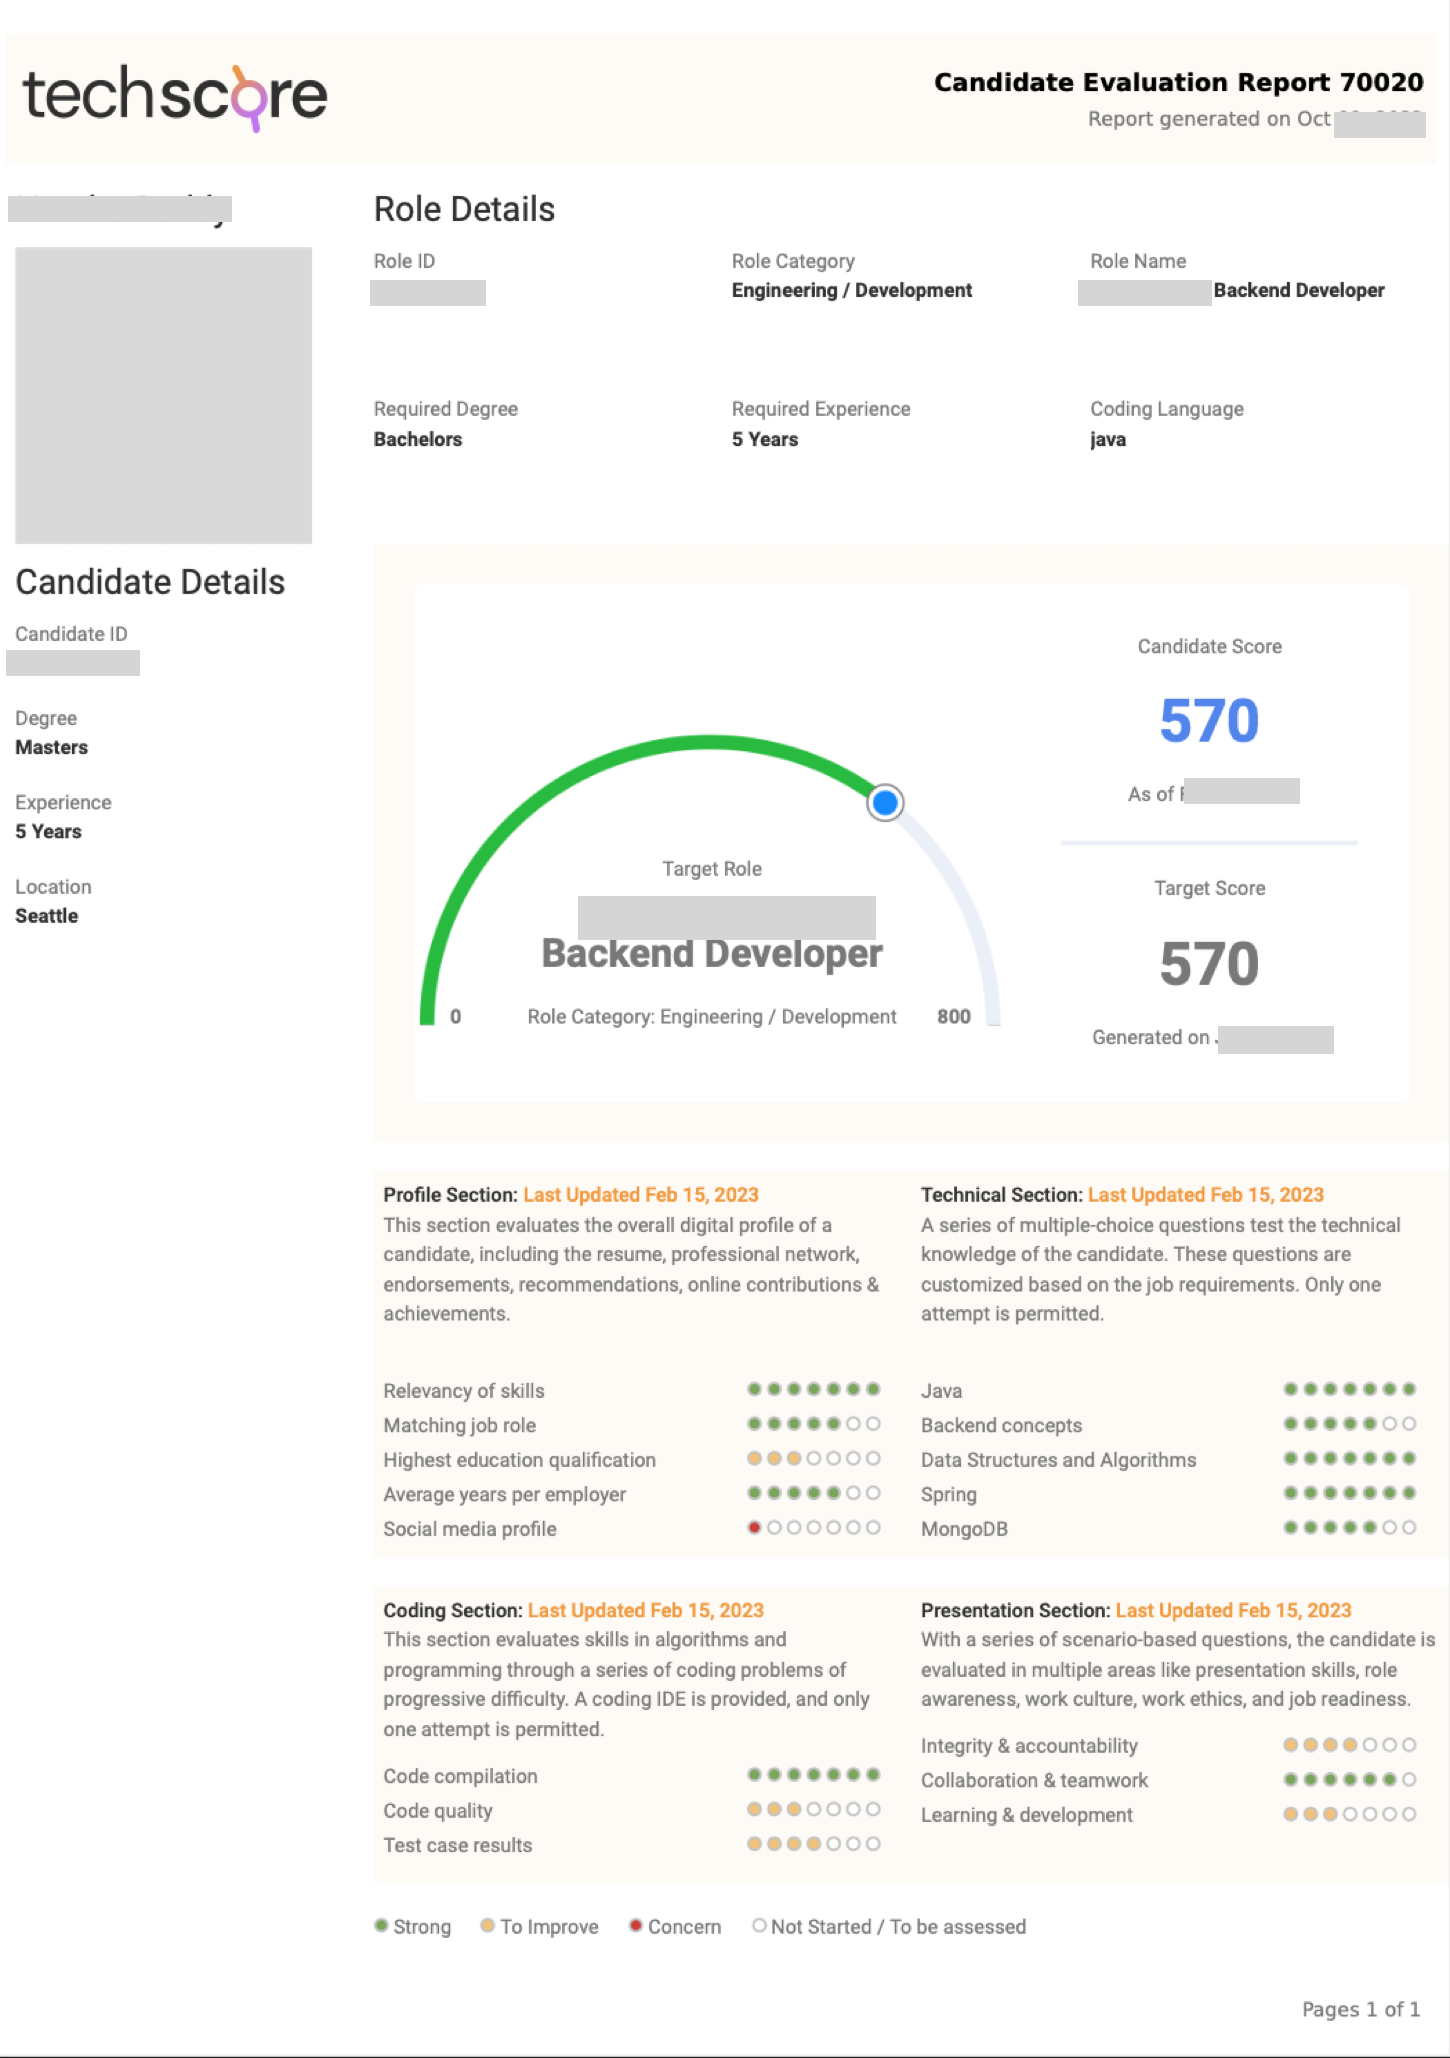
5. Download Candidate Evaluation Report
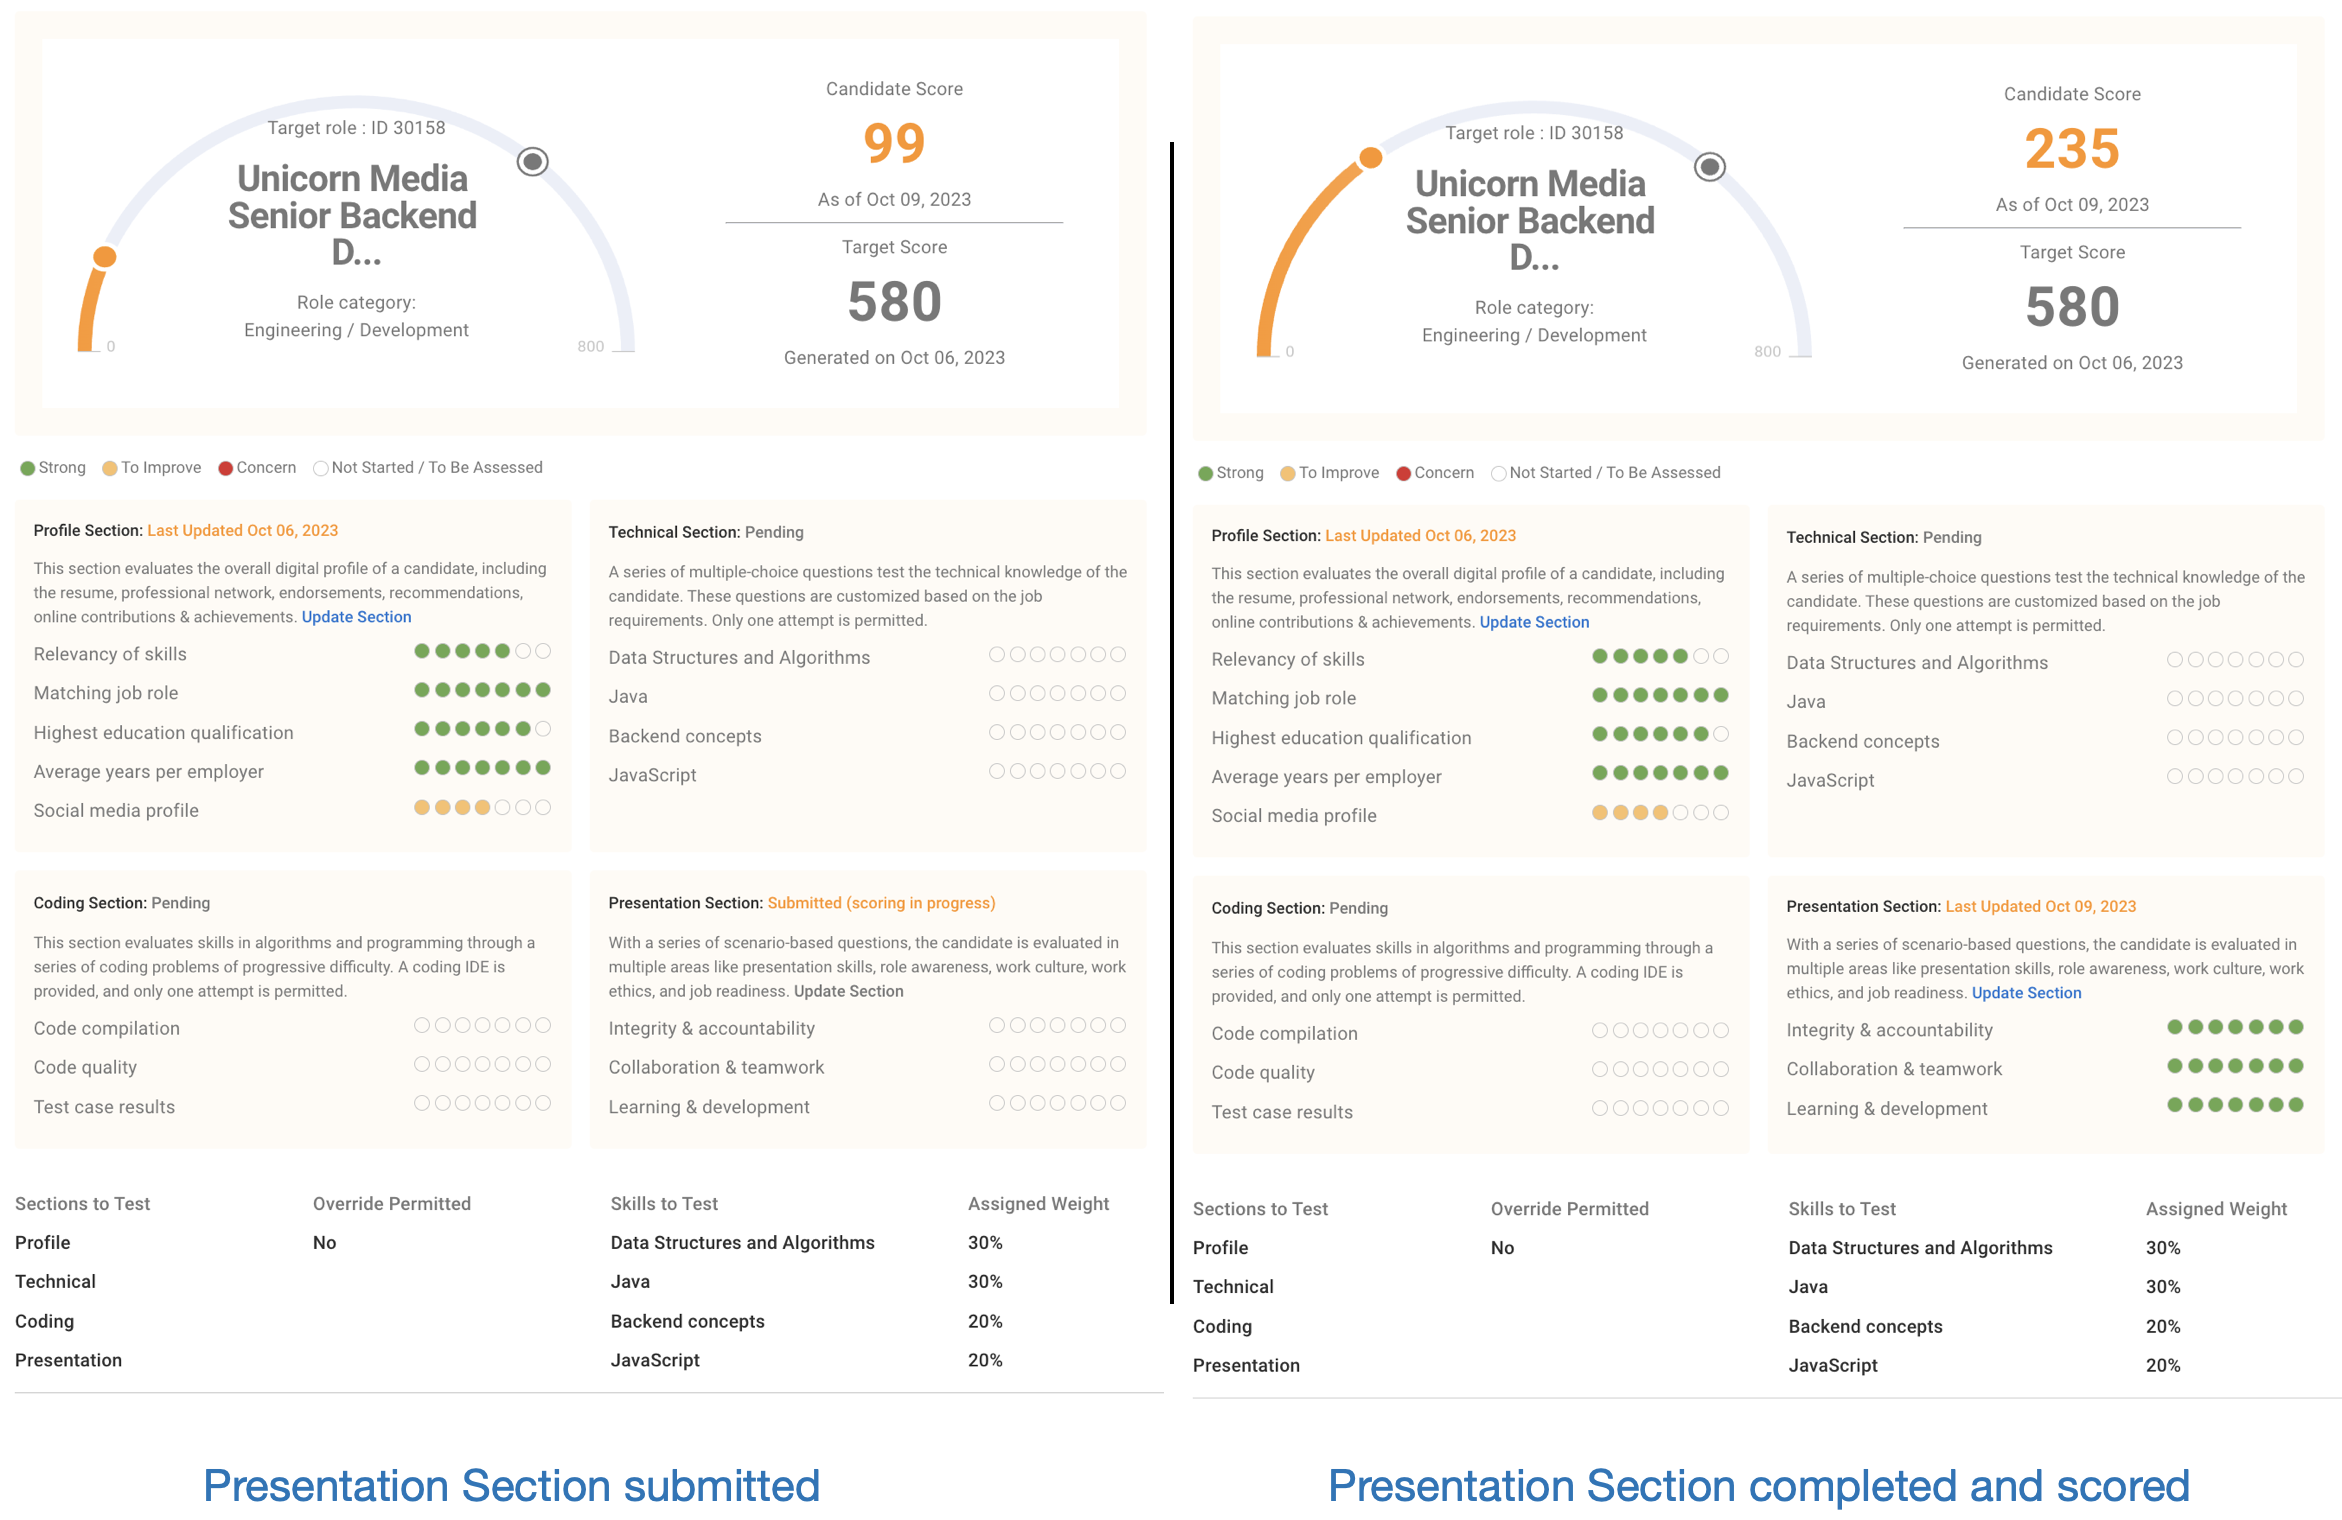
After the candidate completes the assessment you will see all sections marked with the Last Updated date along with the red, yellow, and green dots against each of the section attributes depending on their performance. Now you can download the PDF report or share a report link with your team members and hiring managers.
- Scroll to the bottom of the invite page. On the right, you have various options for the invite report. You can open or copy a shareable link for the report or download a PDF of the one-page summary report.

- Enterprise customers can also download and share custom configured reports.